
TABLE OF CONTENTS
- 1. Configure the PC for Auto Startup
- 2. Windows setup account
- 3. Change PC name
- 4. Create INTELLIBUDS user
- 5. Configure auto login
- 6. Date and time Format
- 7. Software Installation
- 7.1 Install SQL Server
- 7.2 Install SSMS
- 7.3 Install Reporting ServicesGo to Download Microsoft SQL Server 2022 Reporting Services from Official Microsoft Download Center
- 7.4 Software folder
- 7.5 Teamviewer
- 7.6 LabView Runtime Engine
- 7.7 Wireflow fingerprint driver
- 7.8 FreeFileSync
- 7.9 VMWare Player
- 7.10 FactoryTalk View Installation
- 7.11 Anydesk InstallationSetup anydesk and set the password to Unattended Access and password as Bitek12345.
- 7.12 Code Startup (Shell:Startup)
- 7.13 Studio 5000
- Install Studio 5000 using office hard drive.
- 7.14 Install LR Device
- 7.15 Copy codeCopy PLC and Server code from "Teams/Client-Specific files/Bitek/Master File.
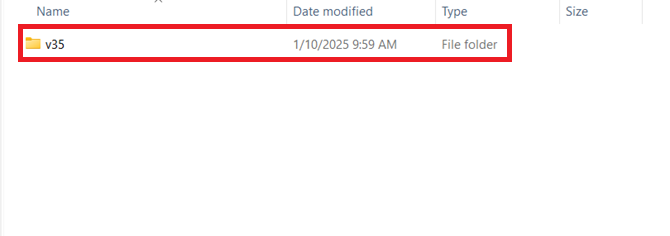
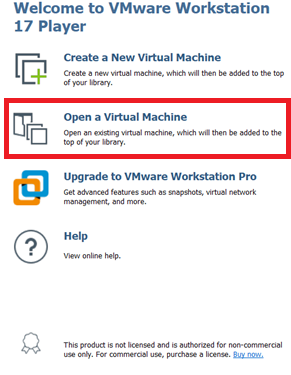
- 7.16 VM V35Copy over the VM for the workstation 2017 to the software folder.When the VM player is up and running after installation. Open the VMware and select open a Virtual Machine.Select the Machine.This will appear and then select.The following popup will appear that will display asking if you moved it or copied it. Select “I Moved it.”
- 8. Clear the desktop
- 9. Remove all entertainment applications
- 10. Disable power and sleep
- 11. Set up Registry for PSExec
- 12. Add AUTOMILL folder
- 13. Disable on Policy Editor
- 14. UDL
- 15. FactoryTalk View Studio
- 16. Checklist
- The standard hardware for an AutoMill SCADA is a Dell Optiplex 5000 desktop PC Dell OptiPlex 5000 Desktops System Guide | Dell South Africa
1. Configure the PC for Auto Startup
- On Startup, press F2 repeatedly to open the BIOS Screen
- Go to Power -> AC recovery
- Set to Power ON. The PC will auto pwoer on when AC power is restored

2. Windows setup account
- Choose English (United States)

- Choose South Africa

- Choose US Keyboard

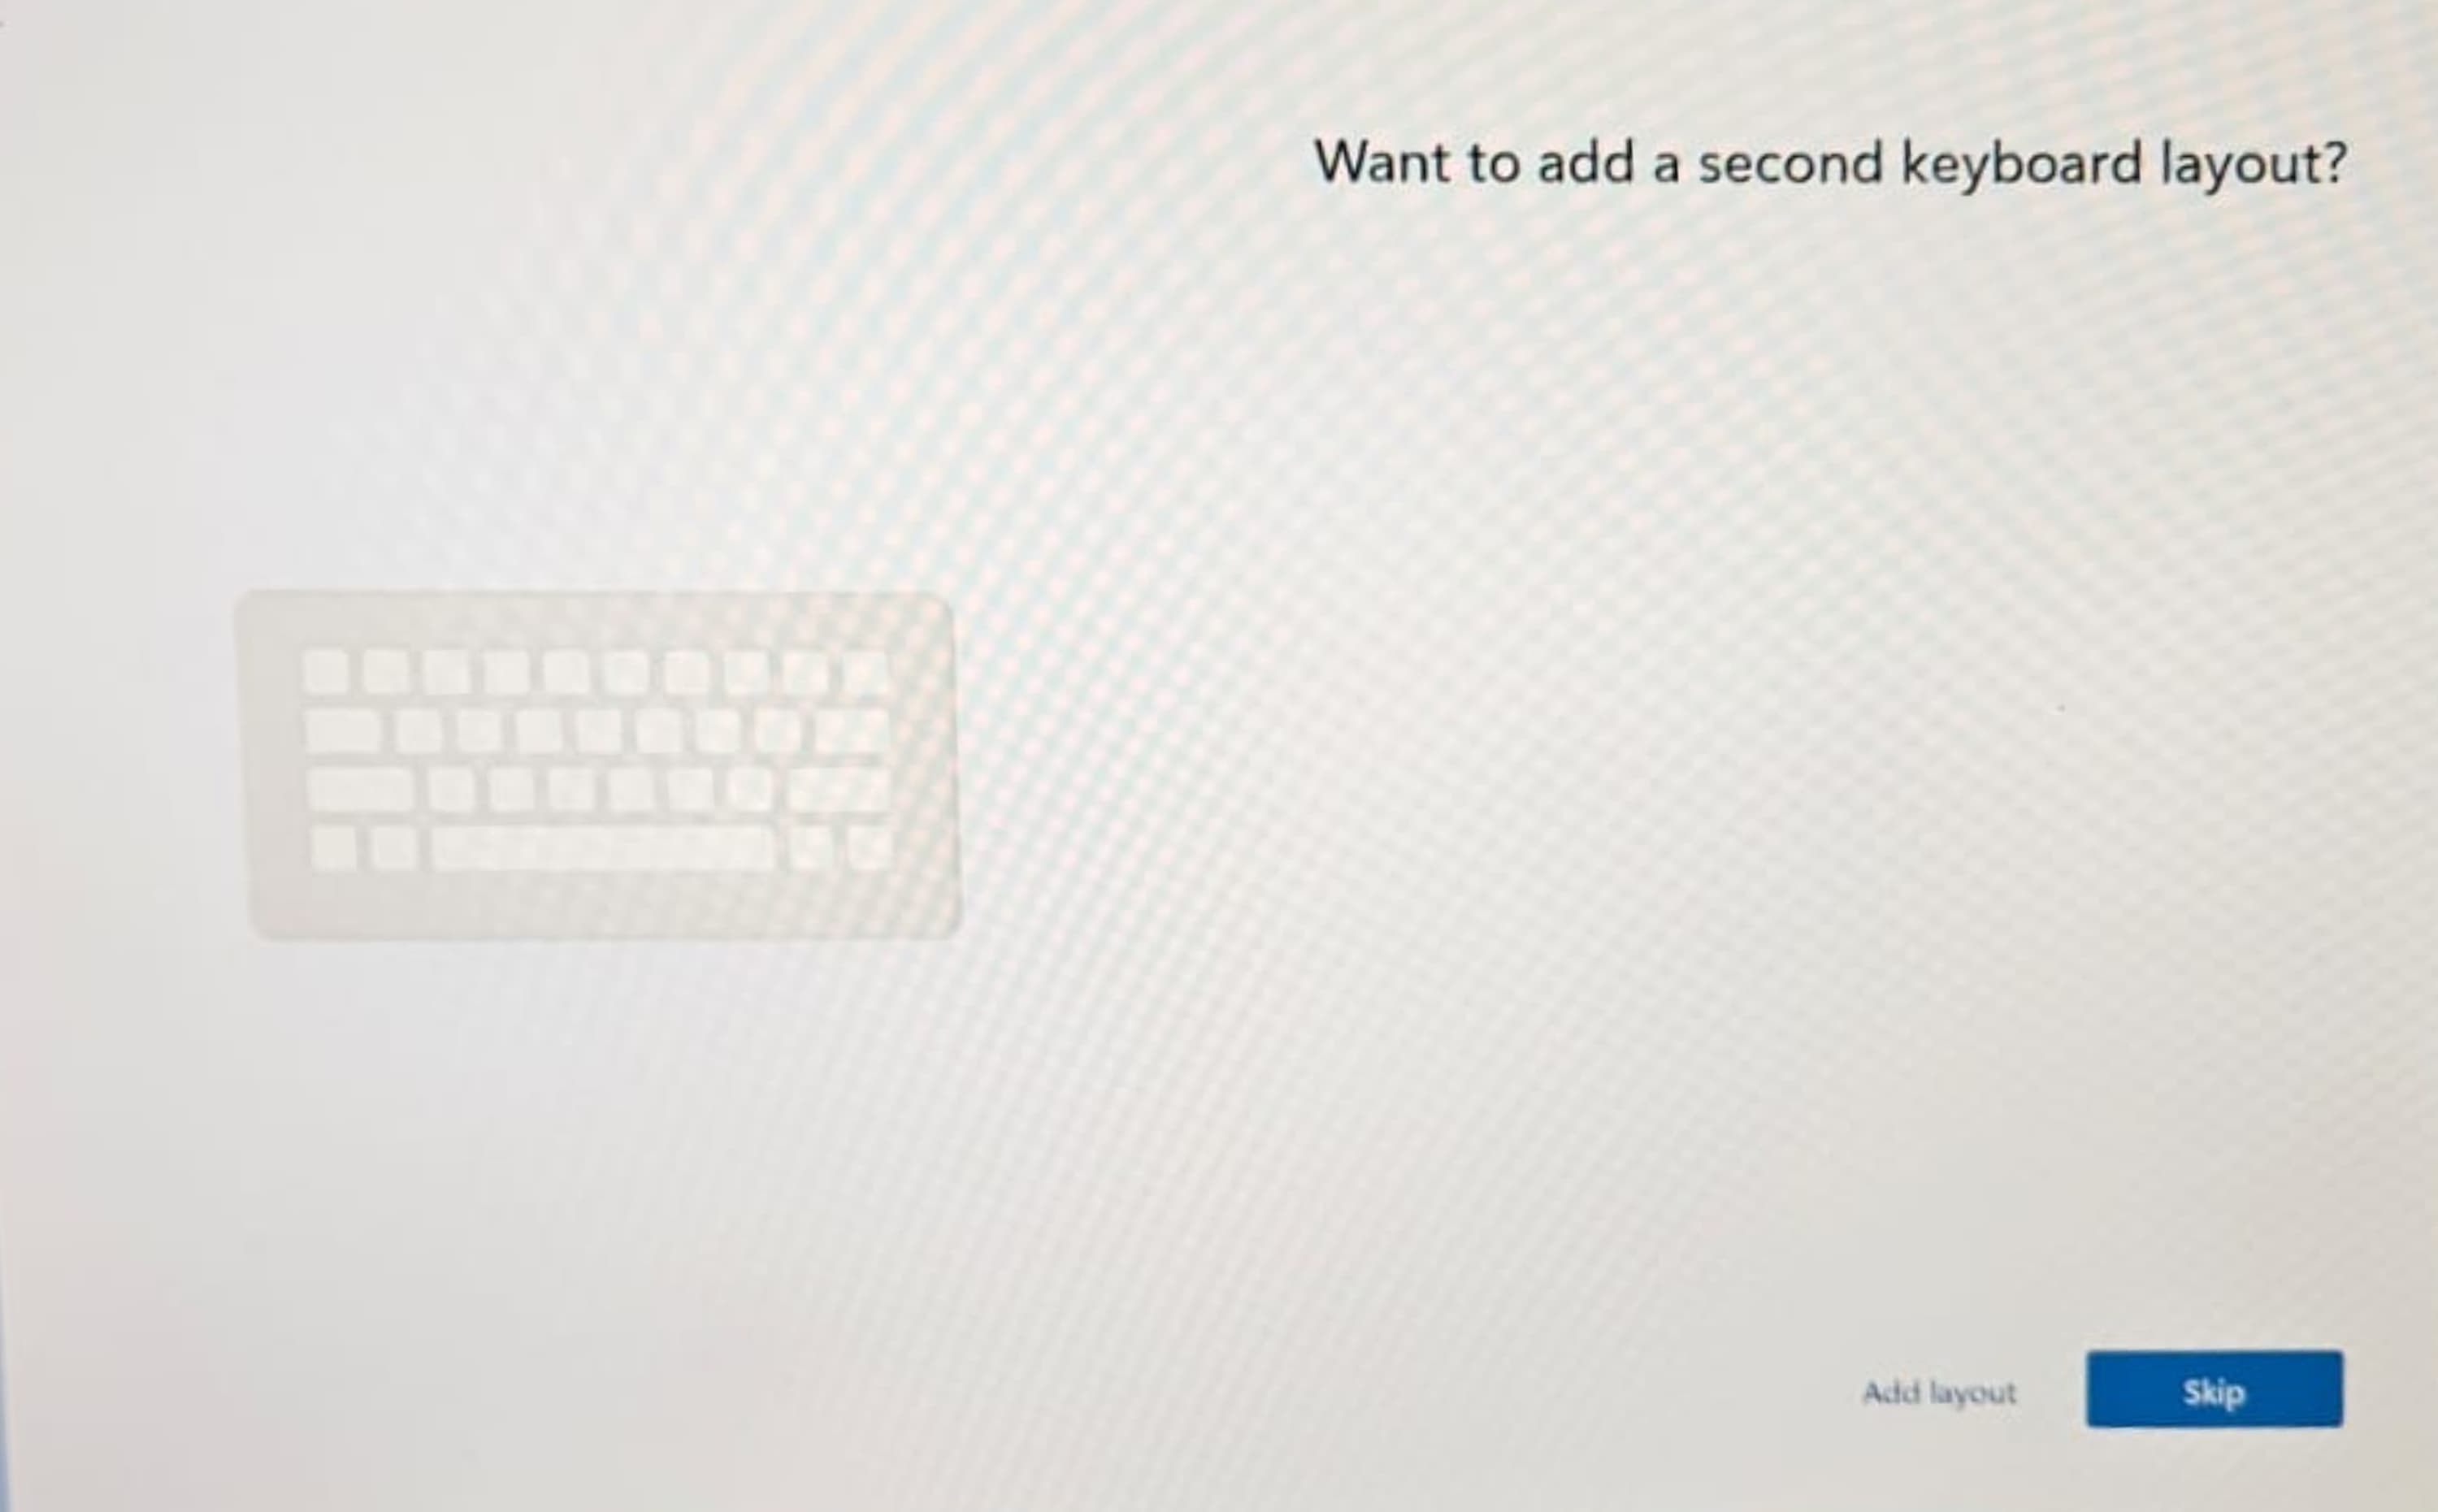
- Skip additional keyboard layouts
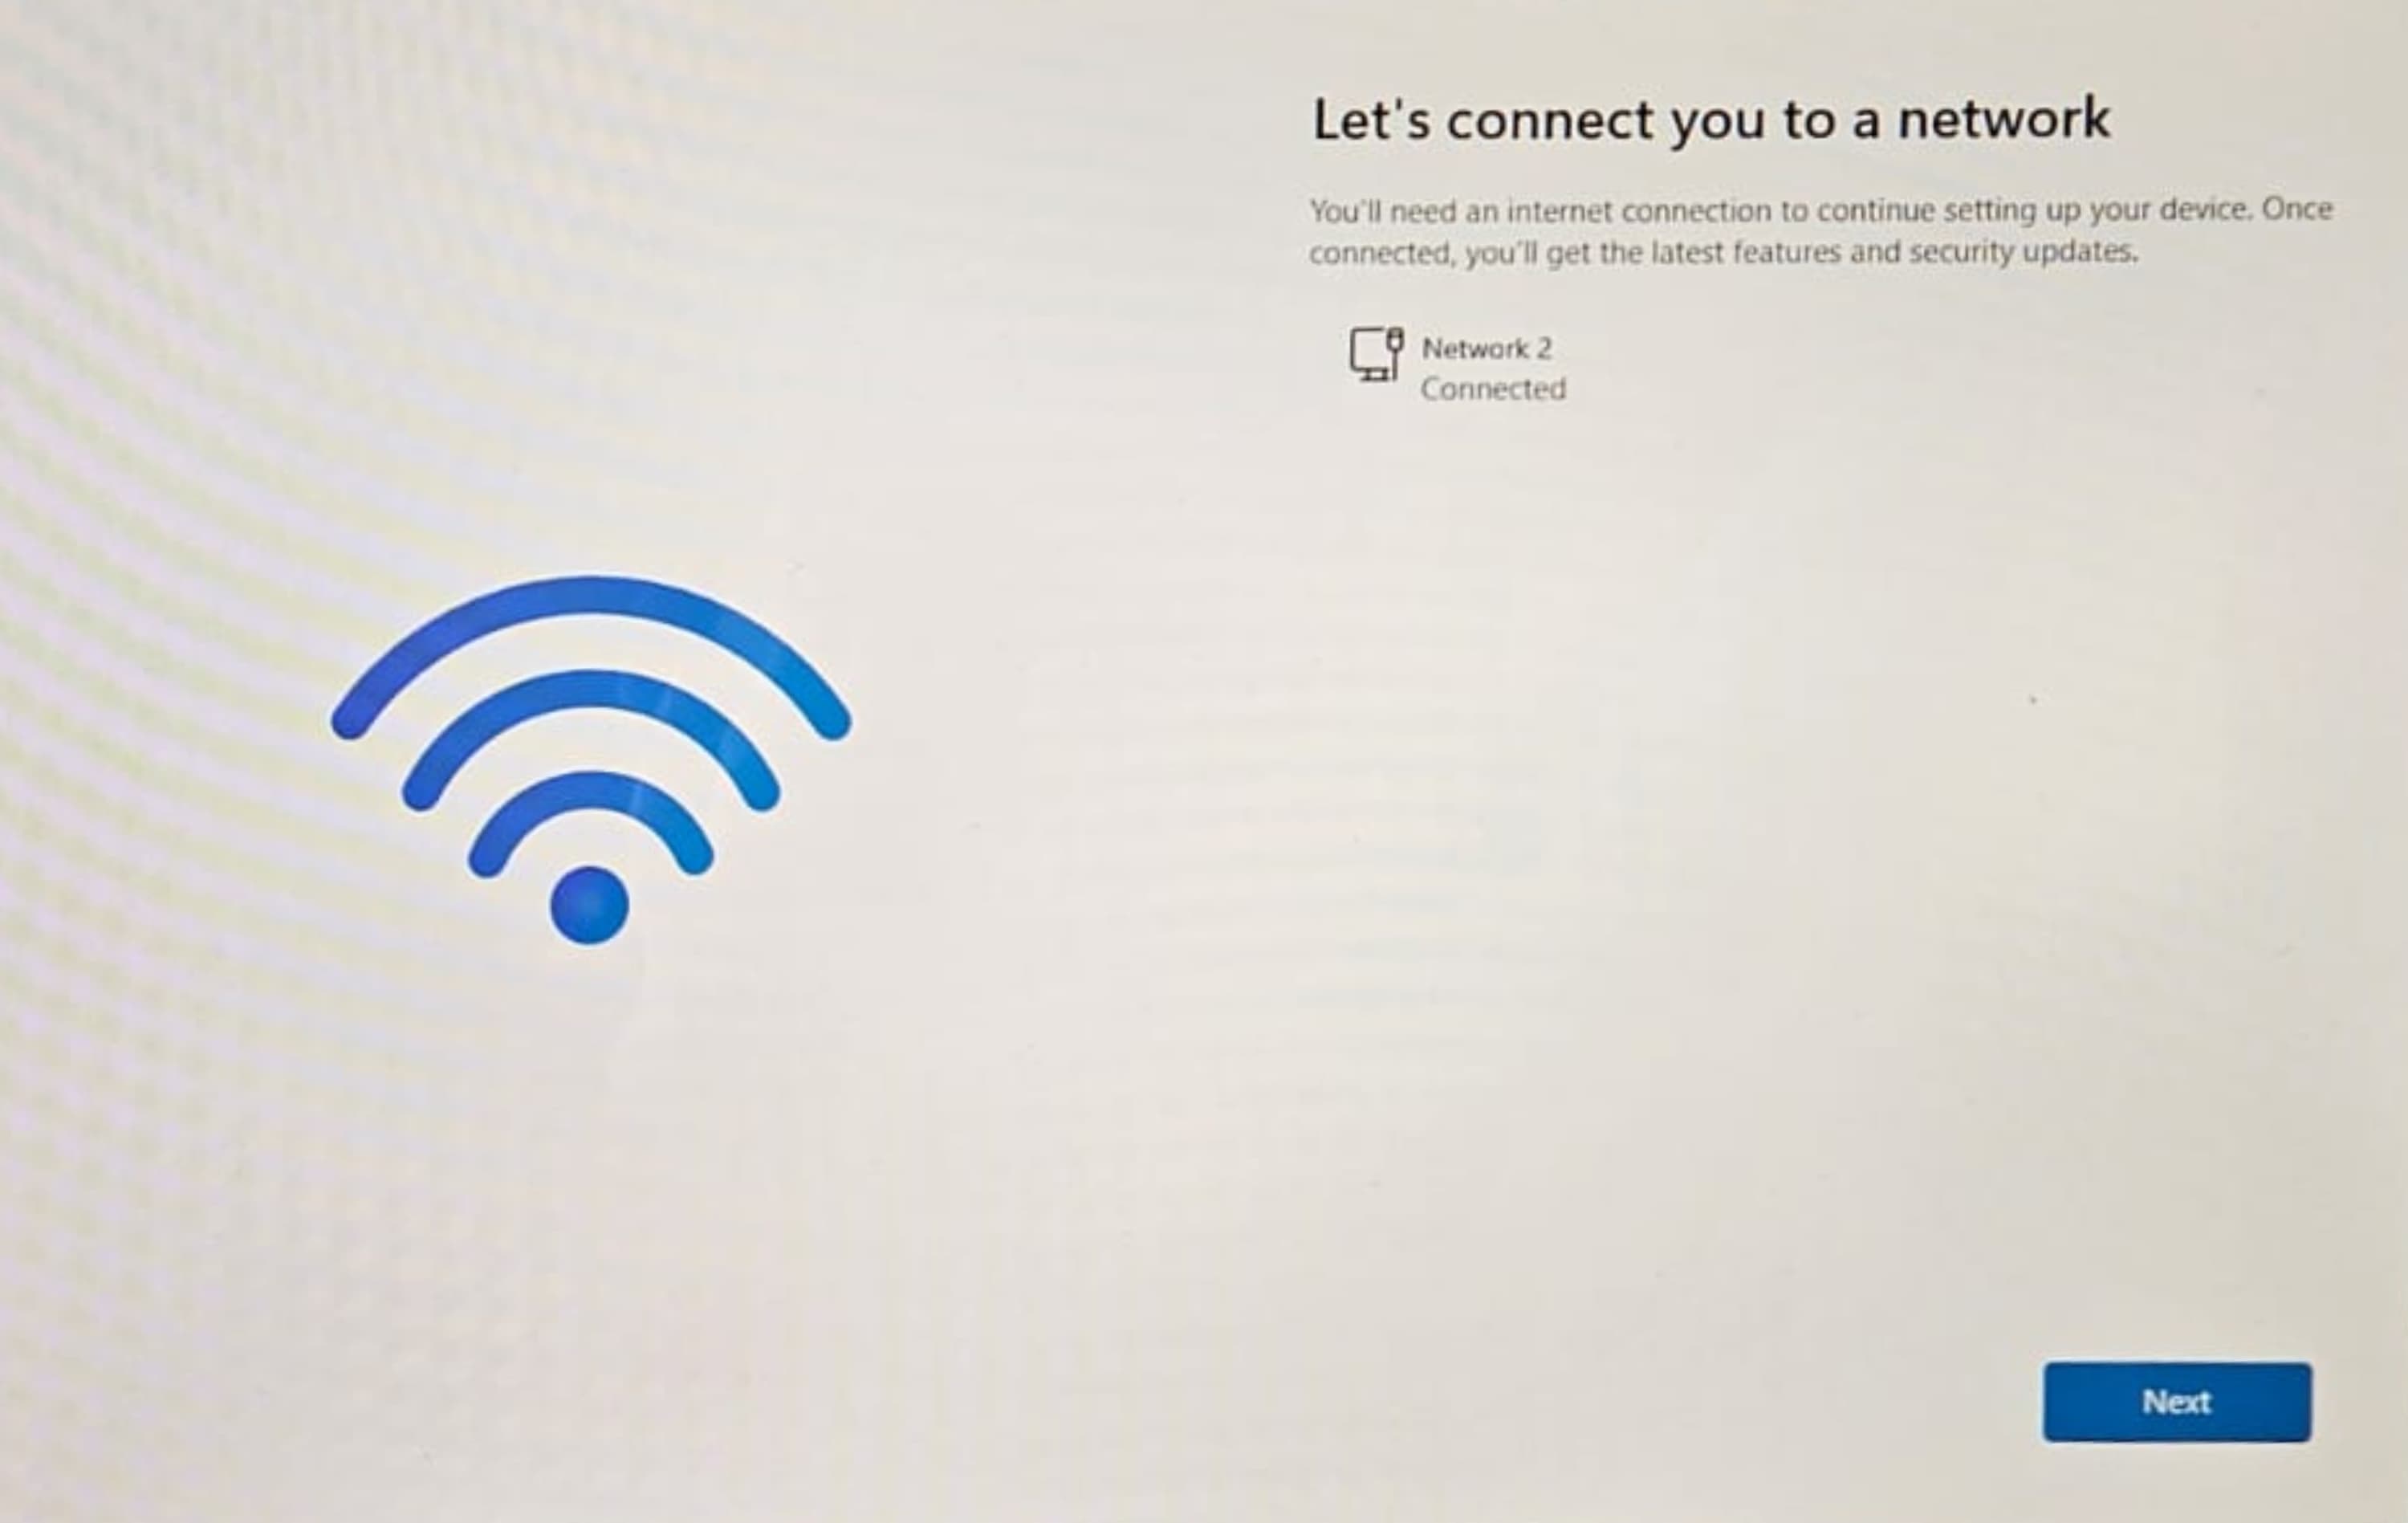
- Connect the pc to the network via ethernet and click next
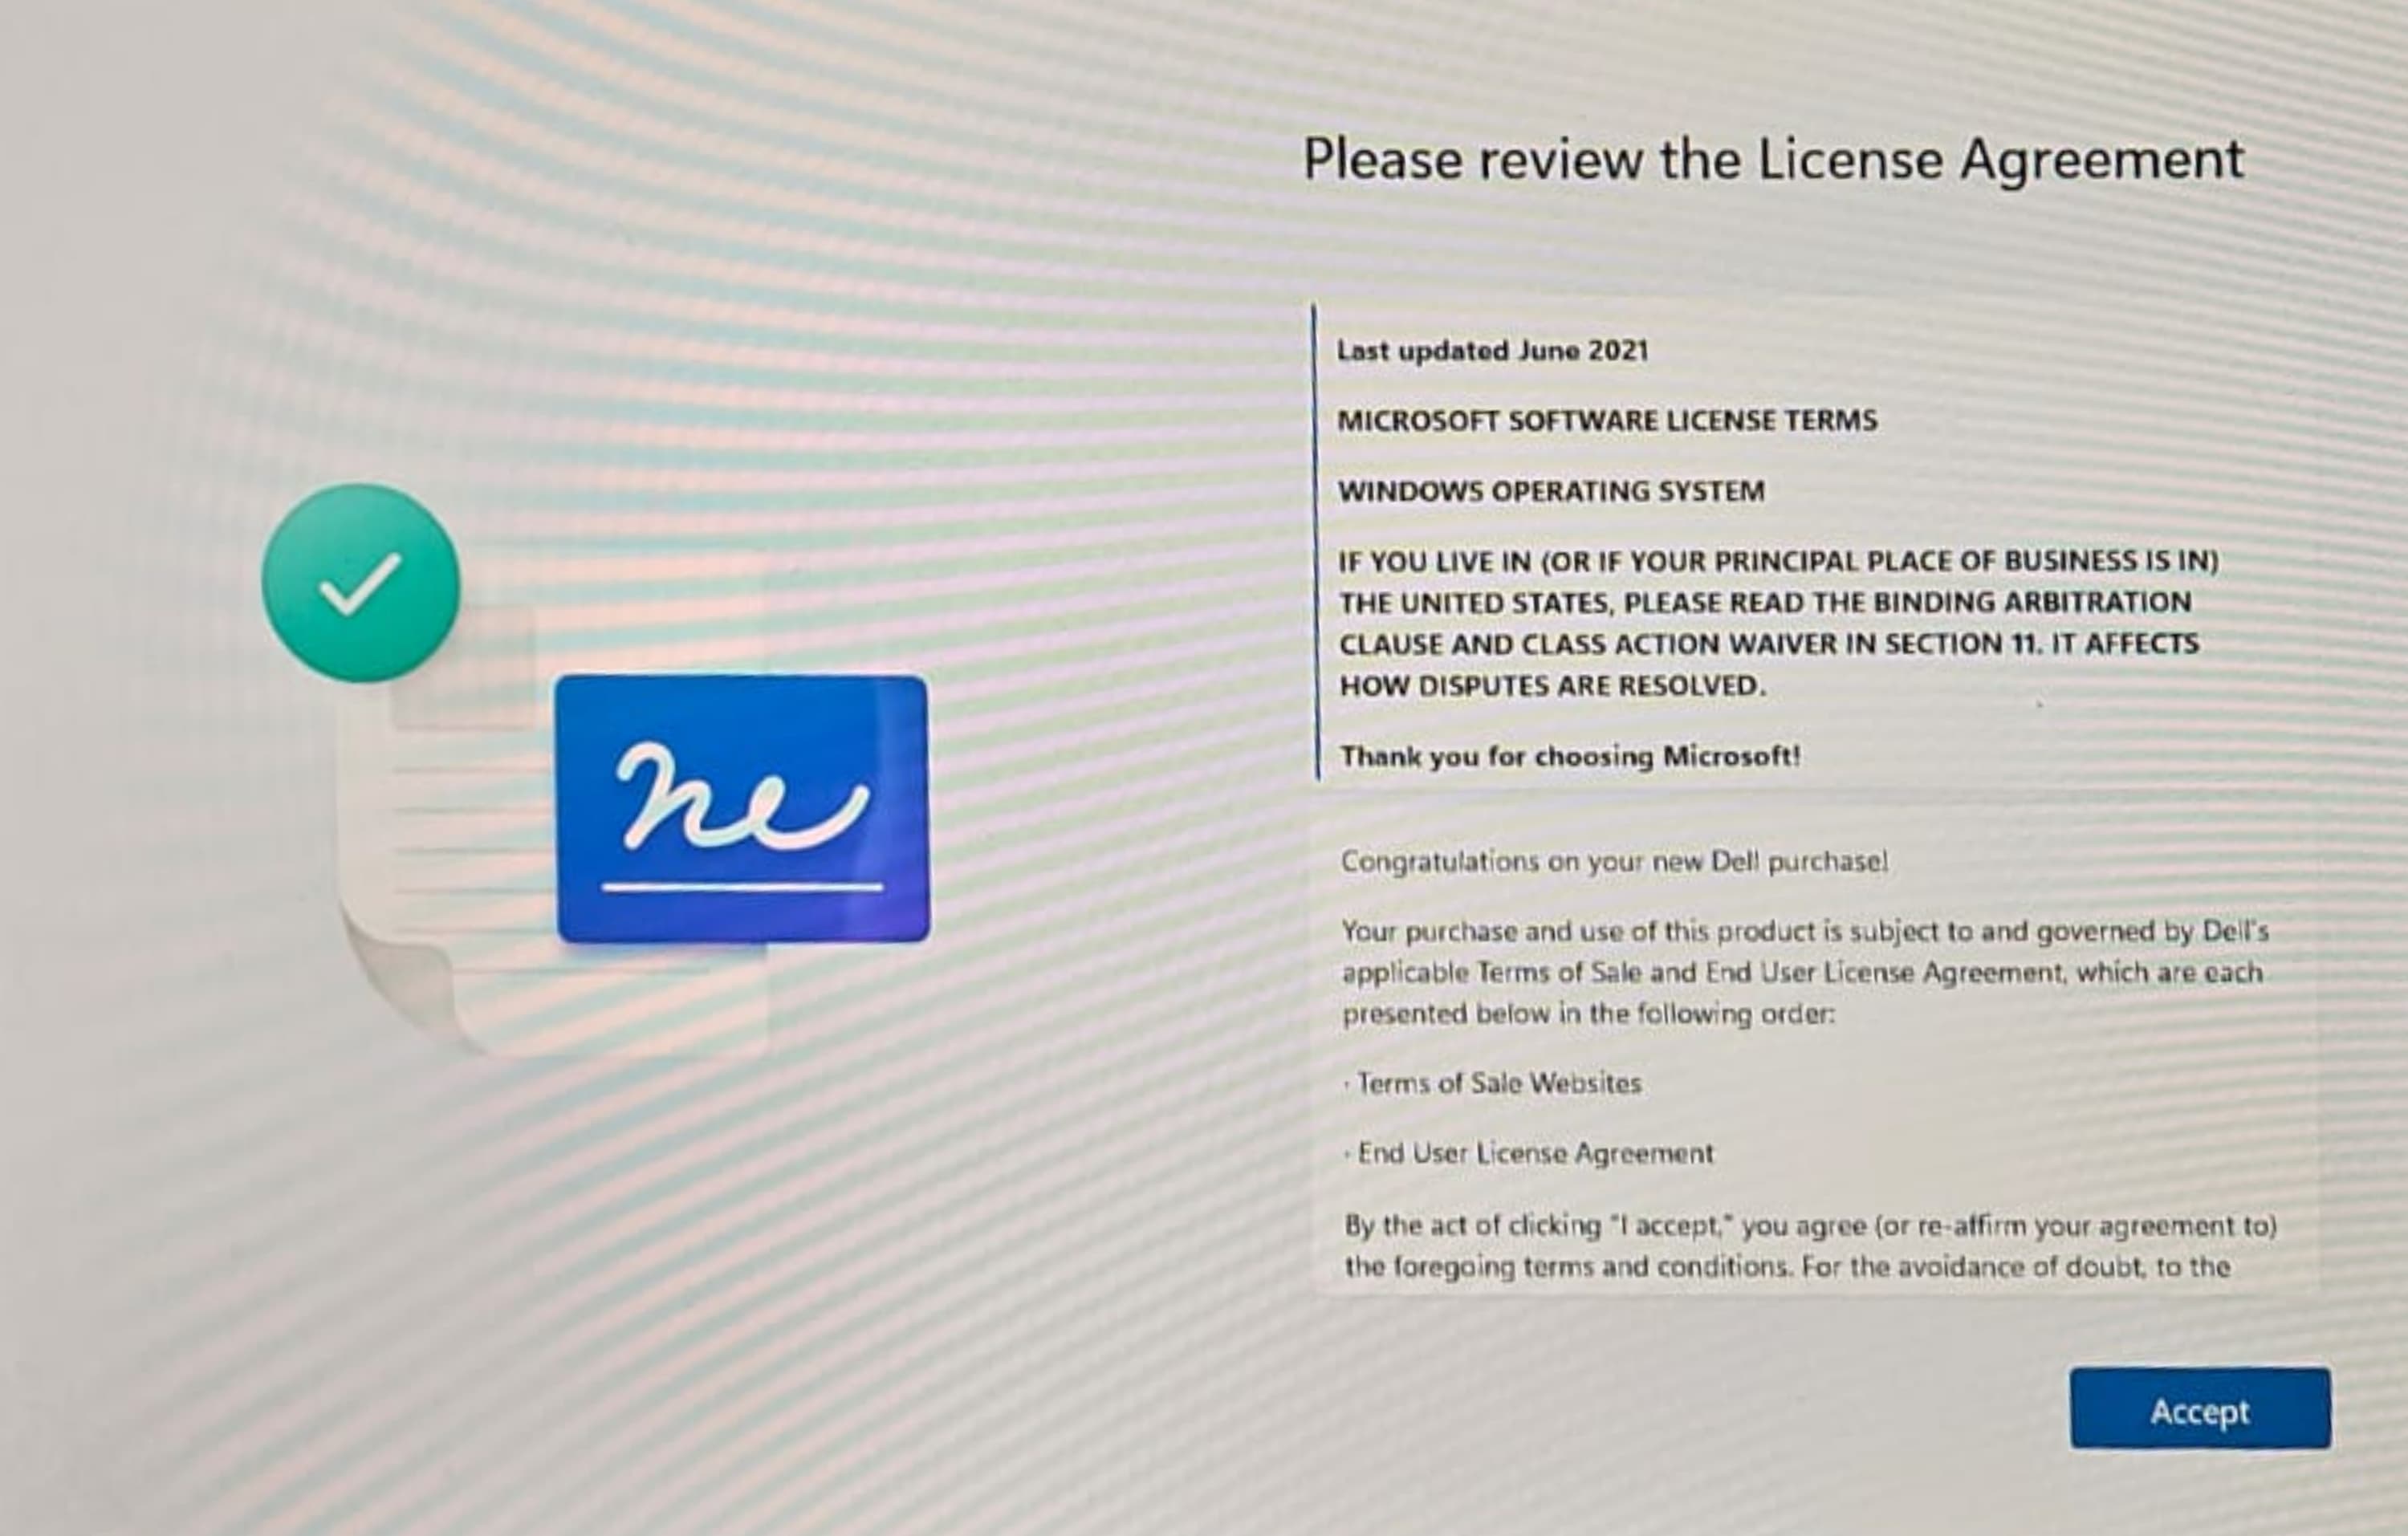
- Accept the license agreement
- Name the device "AM-INTELLIBUDS"

- Once you reach this screen, press shift + F10
- Click on the command prompt window and type "ncpa.cpl" and hit enter

- Right click on Ethernet and Ethernet 2 and disable both ethernet ports

- Once disabled you can close the network window
- Click back into the command prompt window and type “oobe\bypassnro” into command prompt and hit enter, the pc will restart

- Repeat setup as before
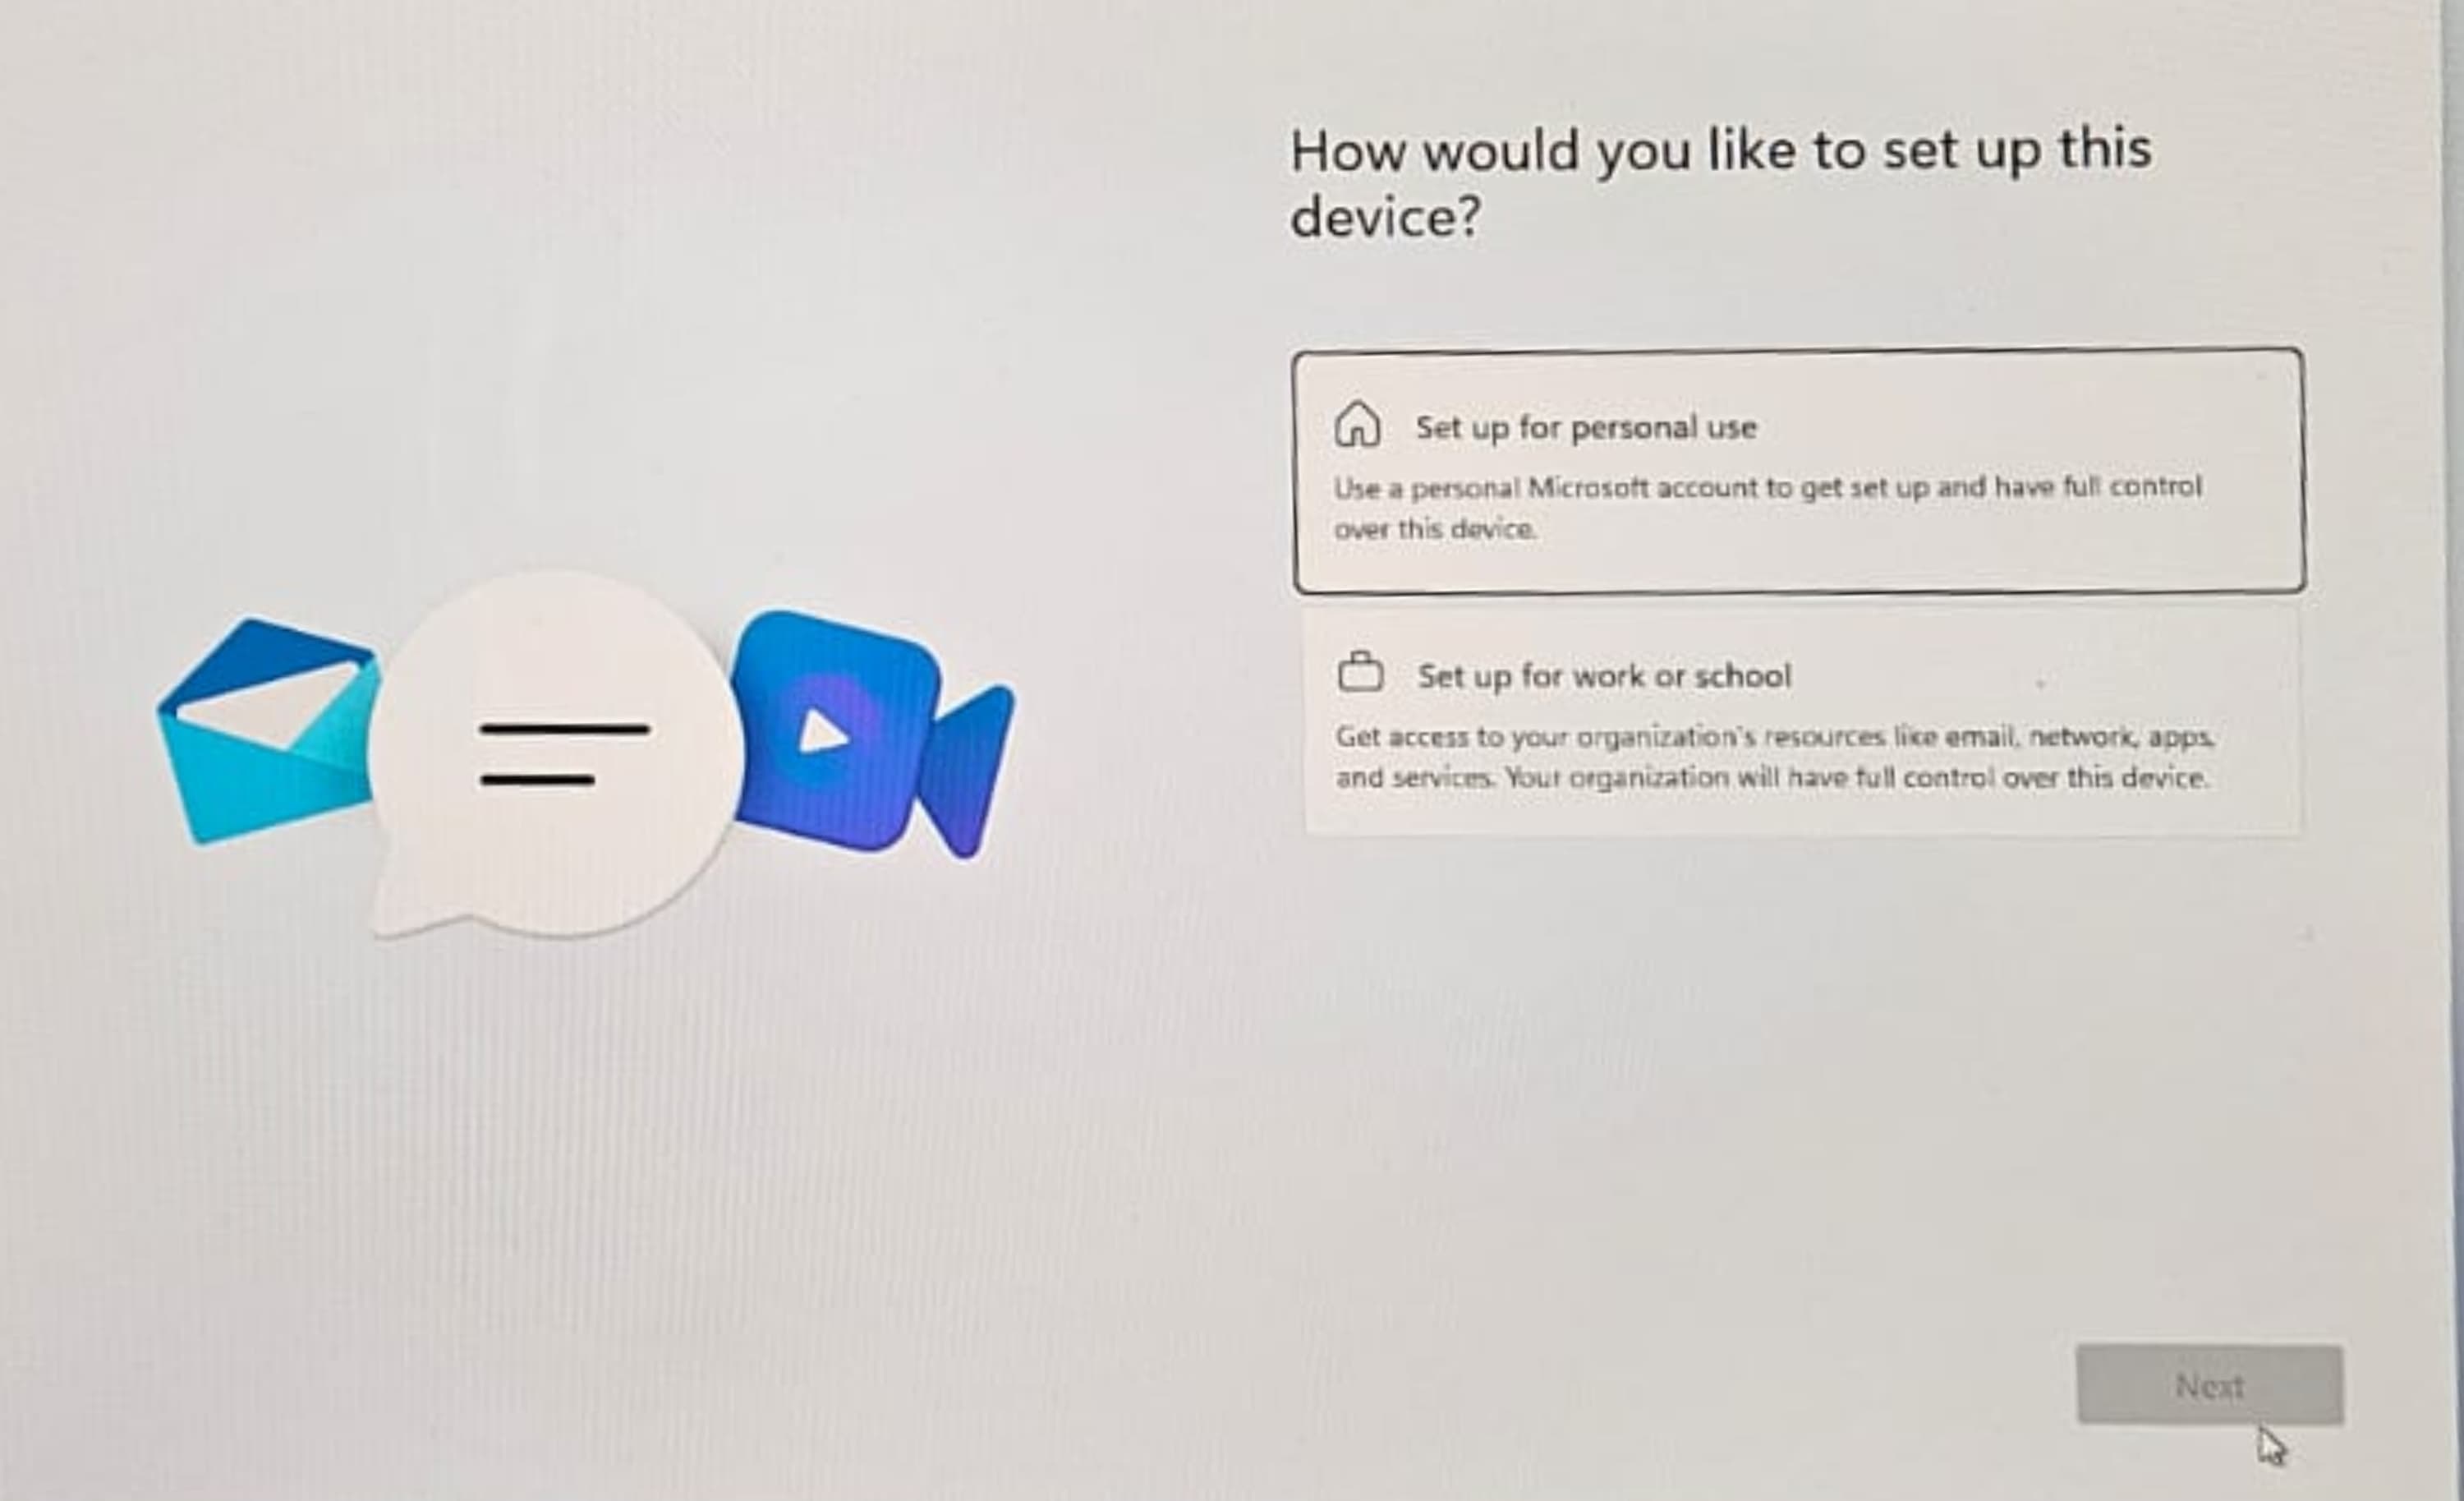
- On this screen click “I don’t have internet”

- On this screen click “Continue with Limited Setup”

- Enter the username as “INTELLIBUDS”
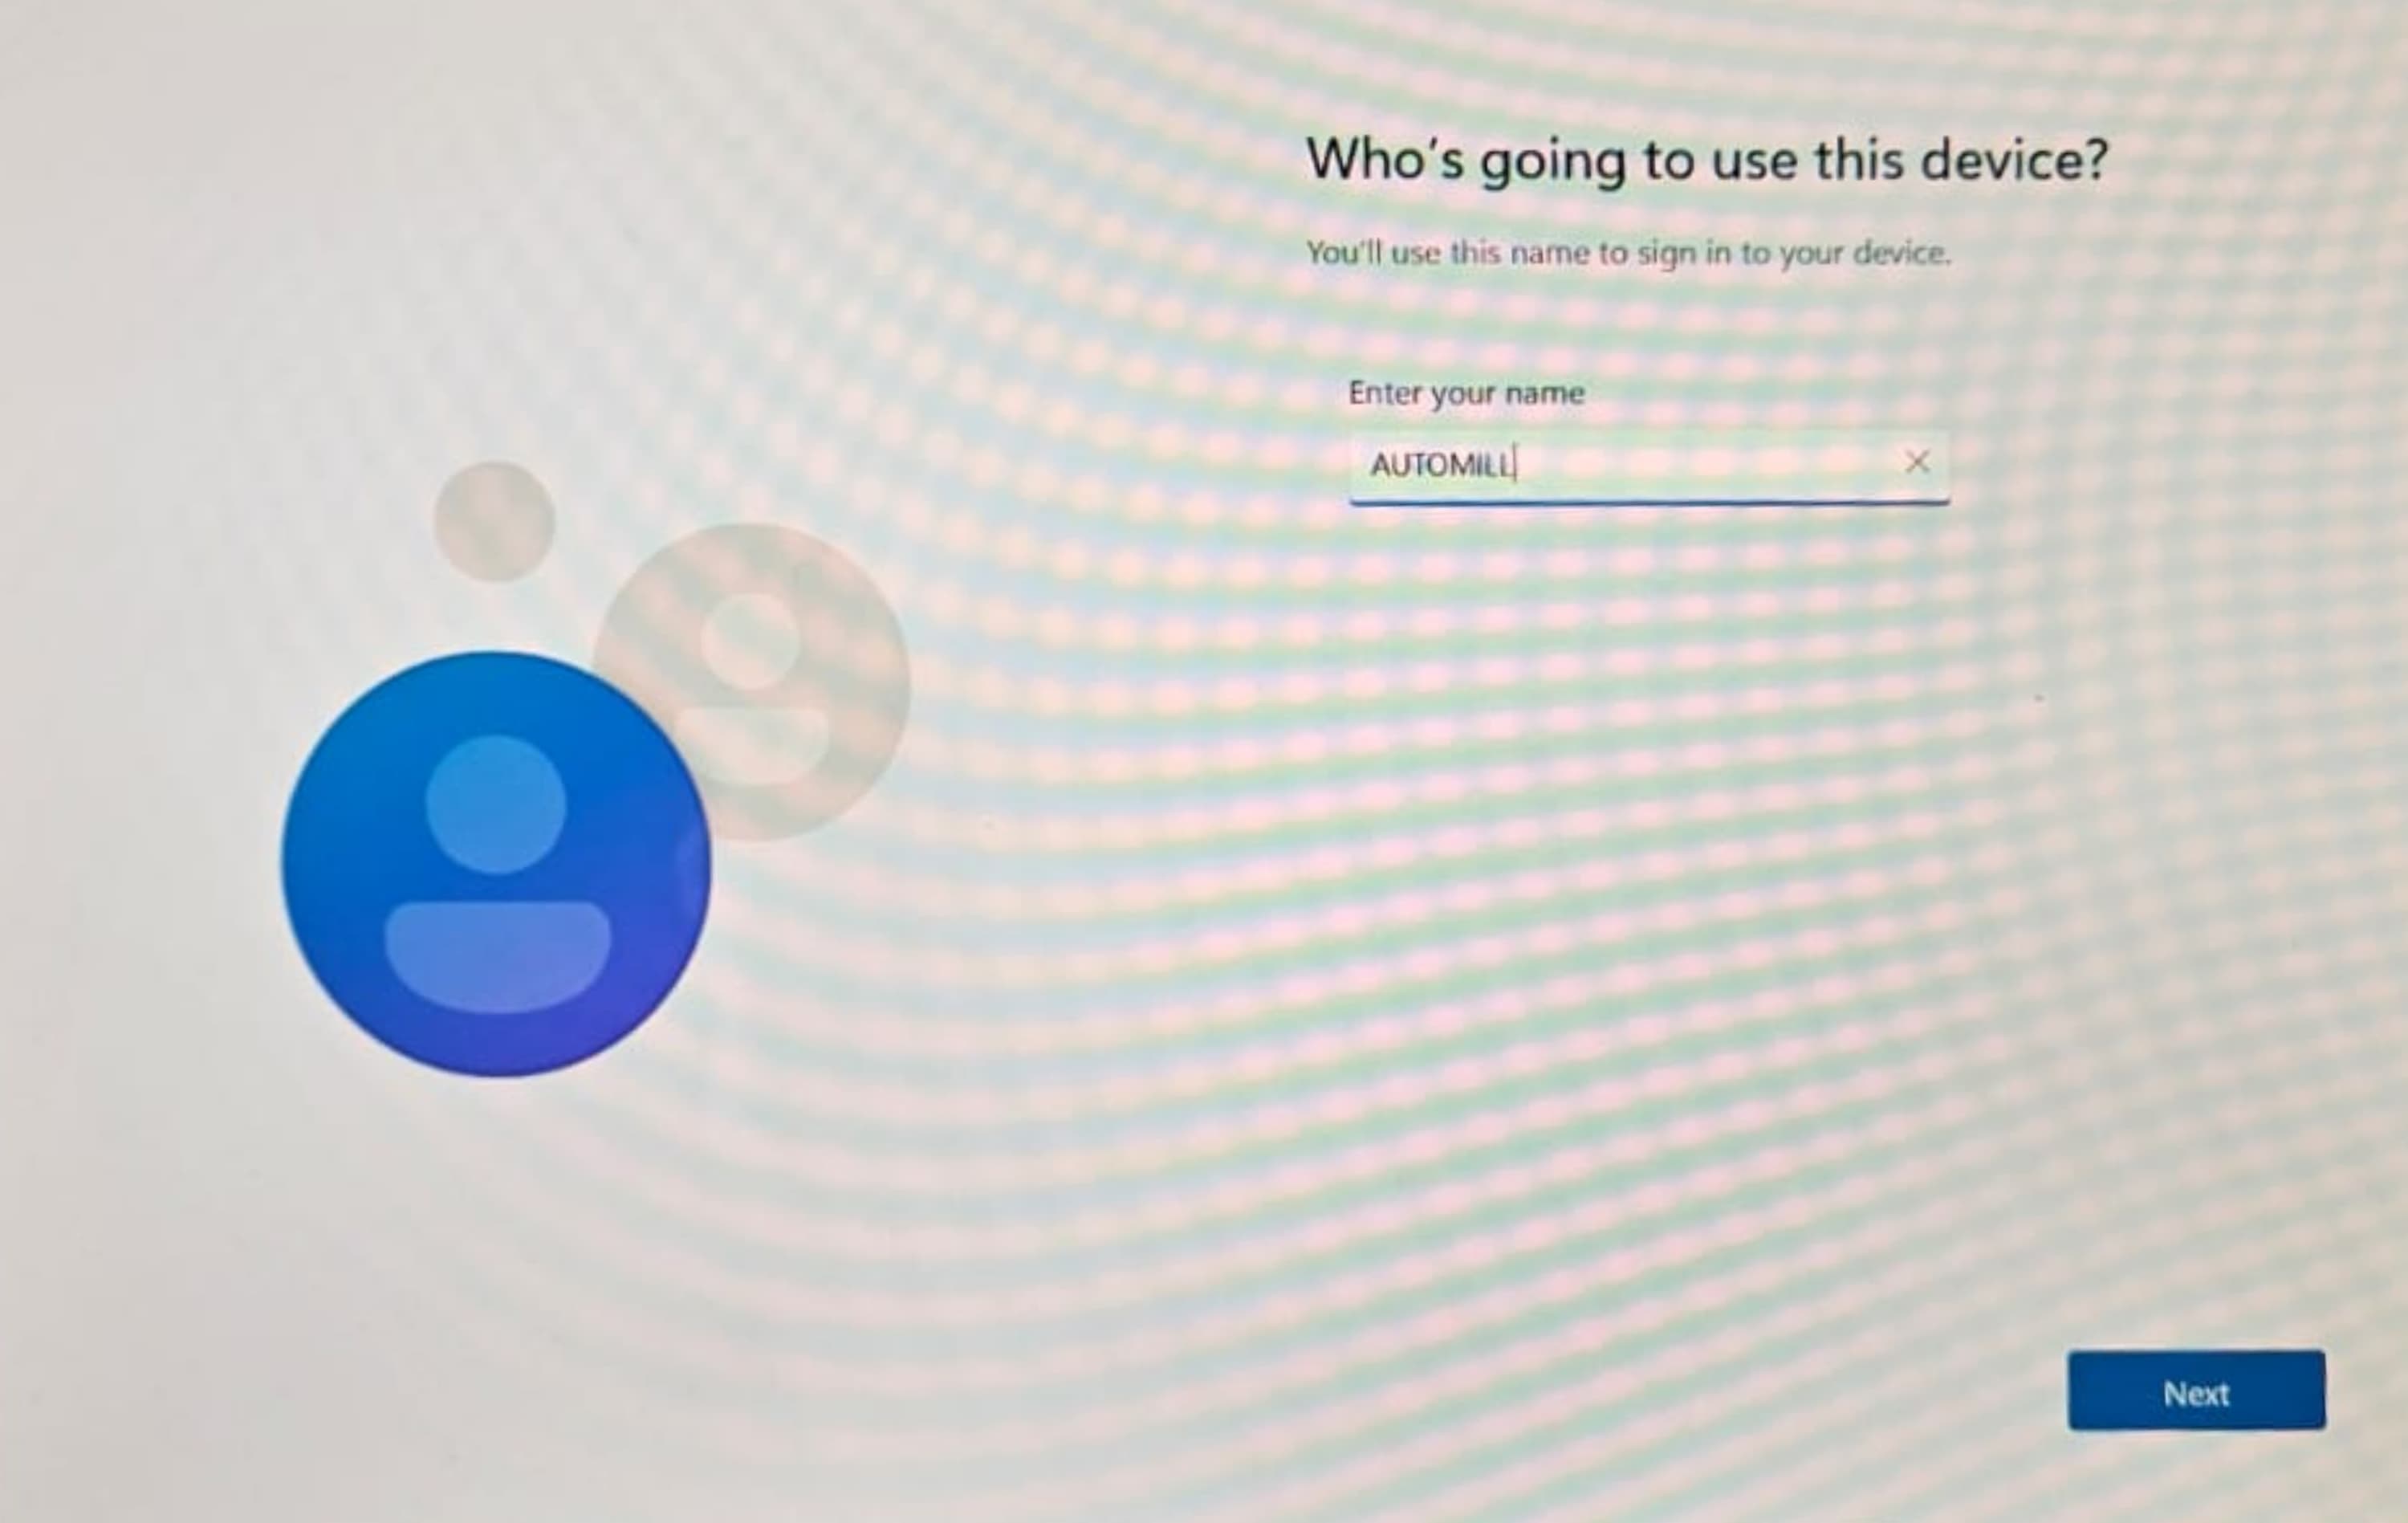
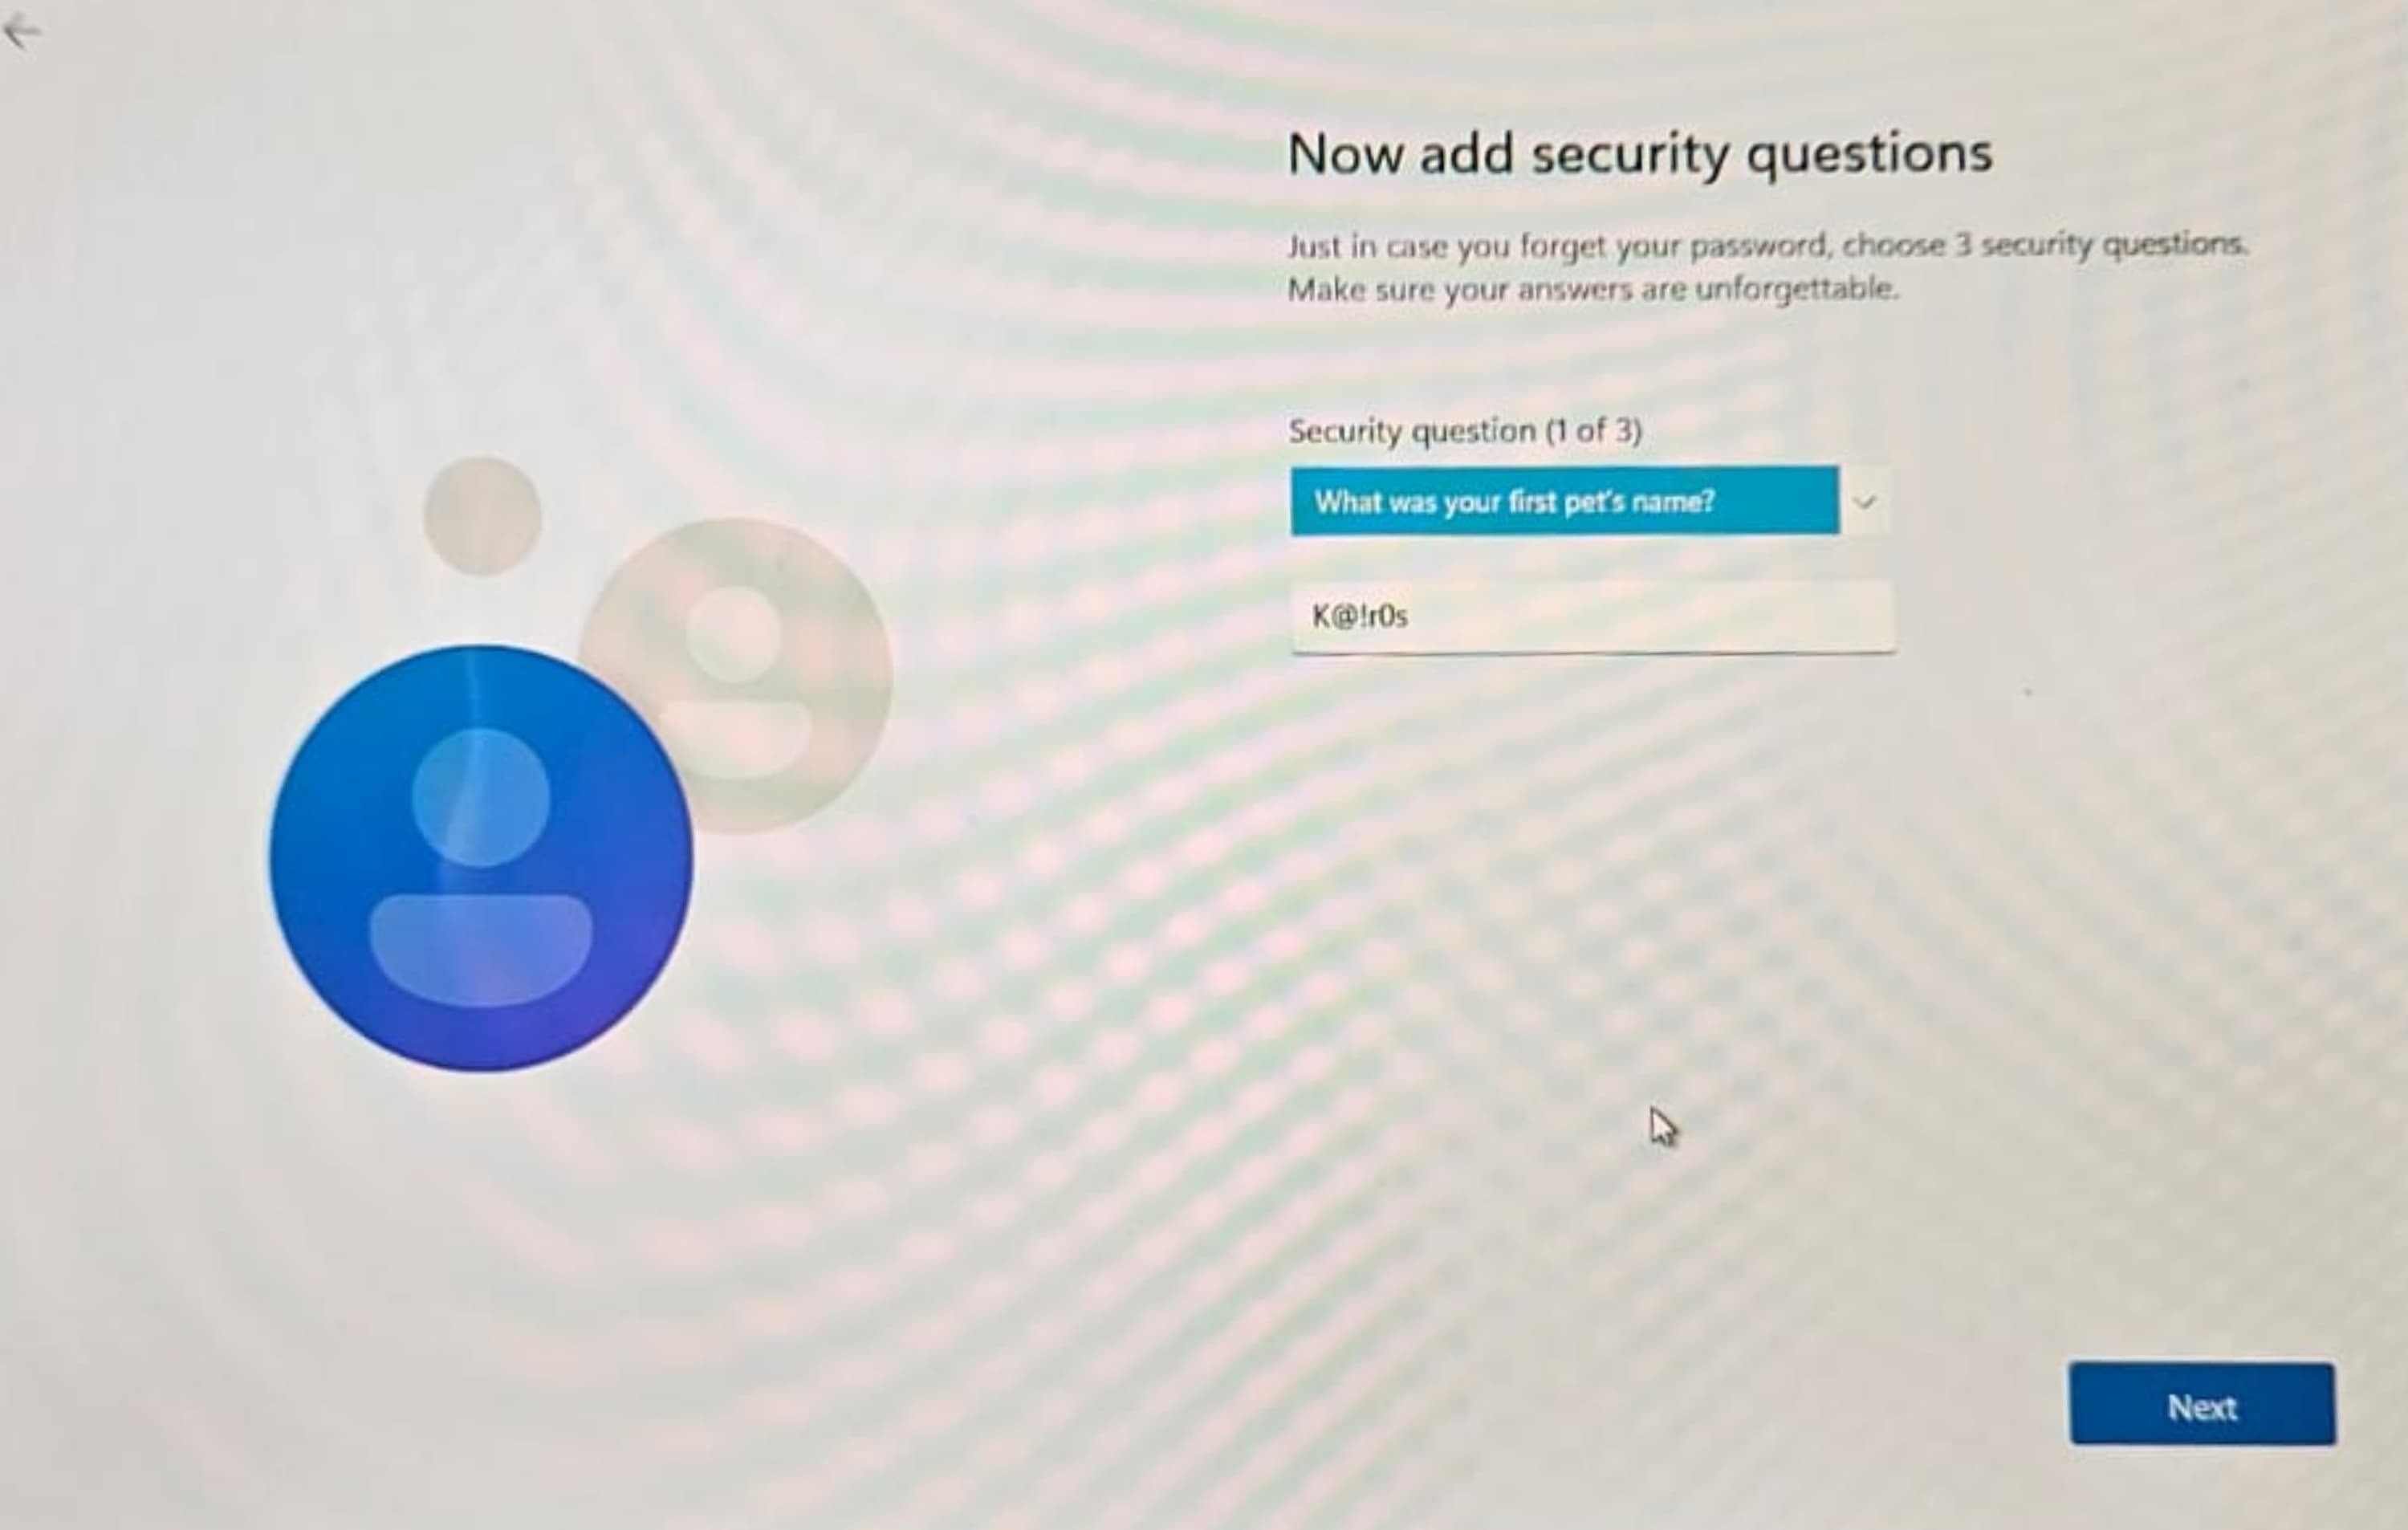
- Set “Bitek1234” as the password and answer to all security questions.

- Disable all privacy settings

- Skip preferences page by hitting next

- Check the privacy policy box and click next

3. Change PC name
- Before you can edit the IP address, you need to re-enable the ethernet ports. To do so, open the command prompt by hitting the windows key, typing "cmd" and pressing enter.
- Once open type "ncpa.cpl" into the command prompt and hit enter

- Right click on Ethernet and Ethernet 2 and Enable both ethernet ports

- Change the IP address to the station IP address
- IP Address: 192.168.3.101 , Subnet Mask: 255.255.0.0
- THIS CAN CHANGE DEPENDING ON SITE NETWORK REQUIREMENTS. CONFIRM WITH ENGINEER IN CHARGE OF PROJECT.
- Go to the control panel -> Network and Internet ->Network and sharing center.


- Click on Ethernet

- Click on Properties
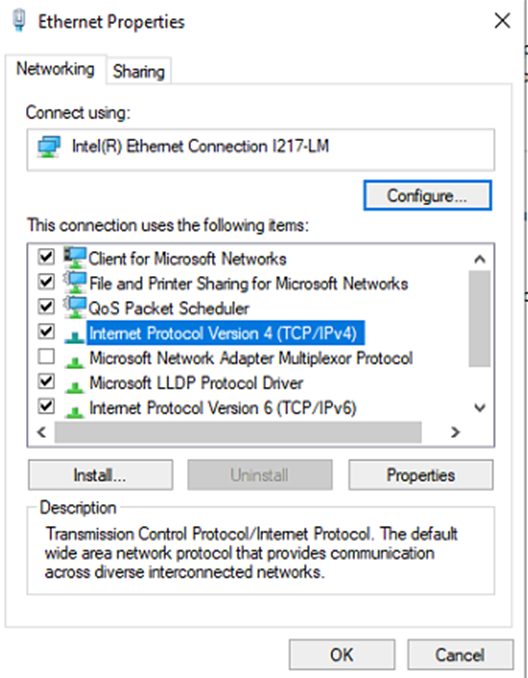
- Internet Protocol Version 4 (TCP/IPv4)
- Click on Properties
- Select Use the following IP address.

- Enter the IP address that the PC will use on the network.
- THIS CAN CHANGE DEPENDING ON SITE NETWORK REQUIREMENTS. CONFIRM WITH ENGINEER IN CHARGE OF PROJECT.
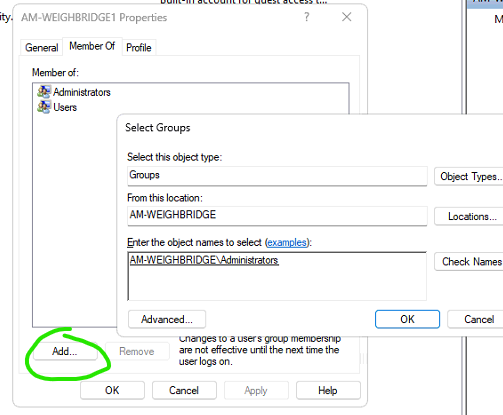
4. Create INTELLIBUDS user
- Go to Computer management->Users
- You are currently logged in as another user (administrator, user, etc).
- Right Click and select 'New User'
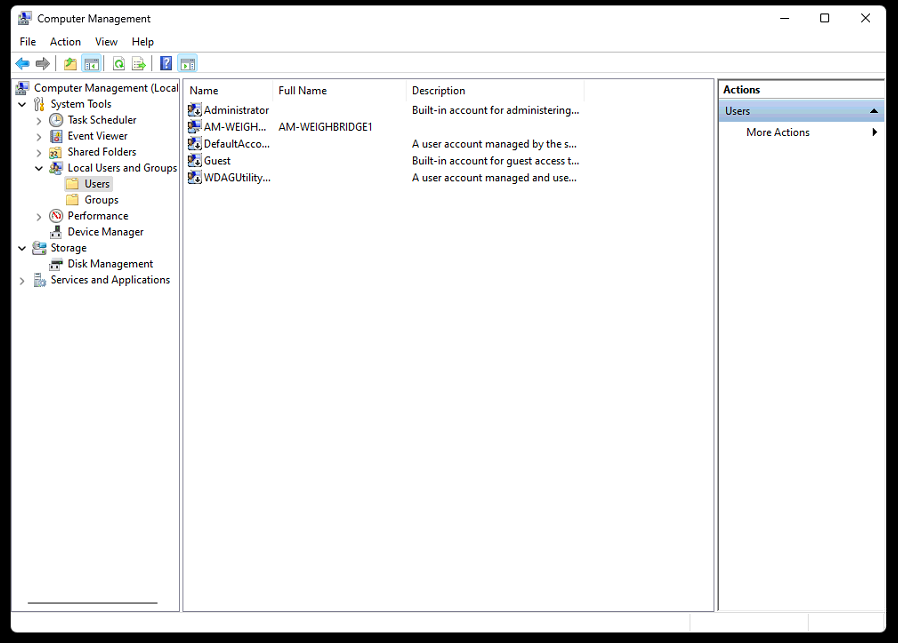
- • Enter the Username and Fullname “INTELLIBUDS”, password is Bitek1234. password never expires.

- Double click on the new user
- Go to Member of

- Click add
- User must be part of Administrators
- Restart and login as the new user.
- Delete the old administrator user.
5. Configure auto login
- Refer to Configure Windows to automate logon - Windows Server | Microsoft Learn
- Open registry editor
- Go to section Computer\HKEY_LOCAL_MACHINE\SOFTWARE\Microsoft\Windows NT\CurrentVersion\Winlogon

- Create new string value AutoAdminLogon, set its value to 1
- Create new string value DefaultUserName, set its value to the username (INTELLIBUDS) you enter in section 4.
- If you are unsure use the value of LastUsedUsername.
- Create new string value DefaultPassword, set its value to Bitek1234.
- Restart the PC to make sure that the Auto login works.
6. Date and time Format
- Open control panel
- Click on Change date, time, or number formats
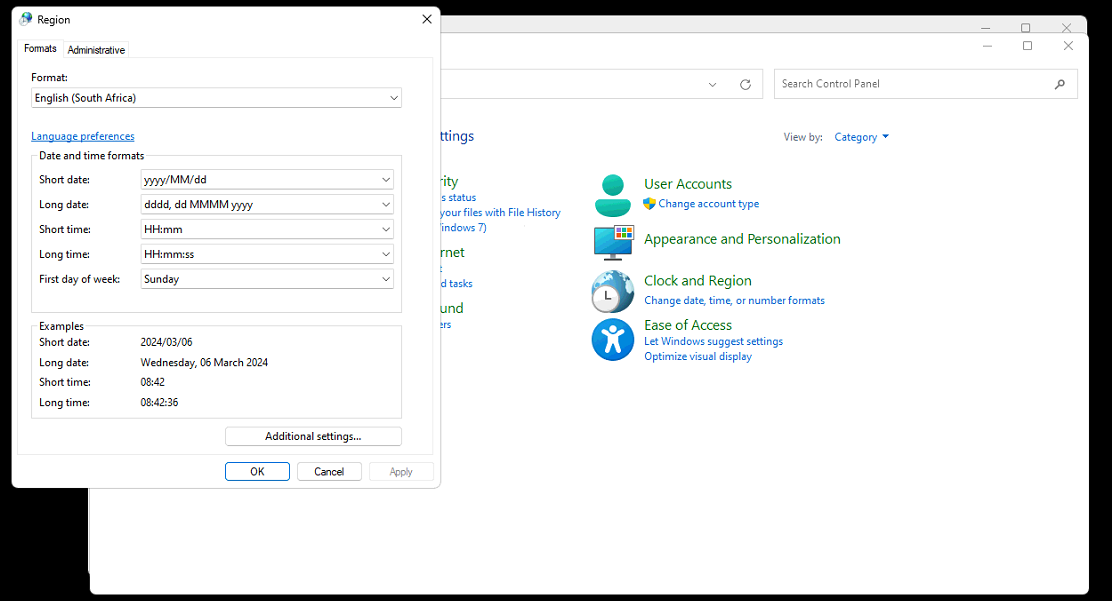
- Short date format - yyyy/MM/dd
- Long time - HH:mm:ss
- Click on Additional settings
- Decimal symbol must be fullstop.

7. Software Installation
7.1 Install SQL Server
Go to SQL Server Downloads | Microsoft
- Download SQL Server Developer
- Run the executable, and select Custom and Install


- Click on New SQL Serverstandalone installation...
- Use Developer edition
- Use the default installation folder. Select feature as follow.
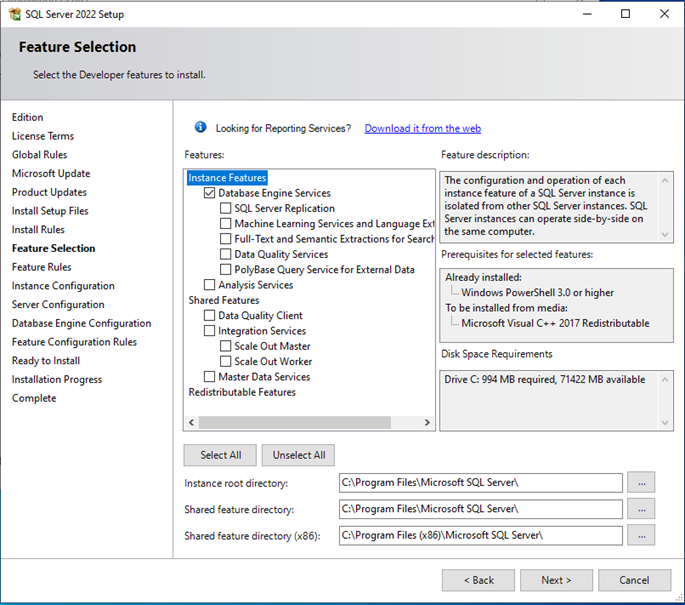
- Named Instance is SQLEXPRESS

- Specify Mixed mode
- Use Bitek1234 as the password
- Add current user

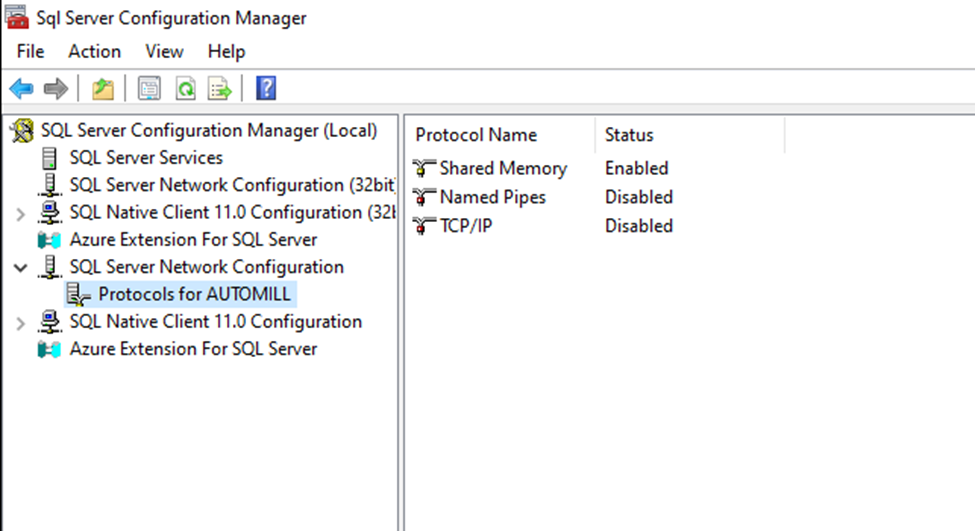
- After Install is done, open SQL Server configuration Manager
- Go to Protocols
- Set Named Pipes to Enabled
- Set TCP/IP to enabled
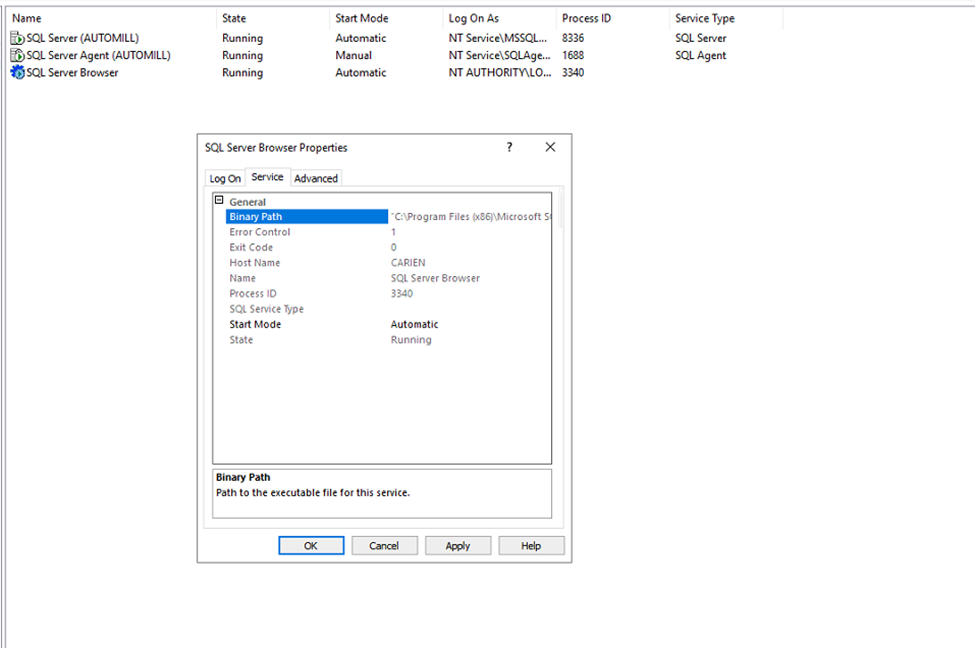
- Ensure SQL Server Browser is running
7.2 Install SSMS
Go to Download SQL Server Management Studio (SSMS) - SQL Server Management Studio (SSMS) | Microsoft Learn
- Install SSMS with default settings


7.3 Install Reporting Services
Go to Download Microsoft SQL Server 2022 Reporting Services from Official Microsoft Download Center
- Run the installer and select Developer Edition
- Follow the default install configuration

- After install select Configure Webservice
- Use the network service user
- Press apply

- Webservice URL. Add the current IP
- Click apply

- Database
- Click Change Database
- Create new report server database
- Enter Server Name - This should be <IP>\AUTOMILL Like you set up when you installed SQL Server
- Authentication type is SQL Server Account.
- Use the sa/Kairos SQL user.

- Web Portal URL
- Click apply
- To set up the E-Mail settings. Use the following information
- Sender Address - tech@kairos-cs.co.za
- SMTP Server - mail.kairos-cs.co.za
- Username - tech@kairos-cs.co.za
- Password - K@!r0s2020-T3cH

7.4 Software folder
- For any project, there must be a server with a software folder on its D Drive already. Otherwise use Automill test server Ursula (192.168.0.161).
- Network credentials the Username : AUTOMILL and Password : funky Kairos.
- Select the Remember my credentials.
- File browse to \\<Server IP>\d\Software

7.5 Teamviewer
- Copy Teamviewer 12 onto this PC and install
- Install with default settings
- After install click on Extras -> Options
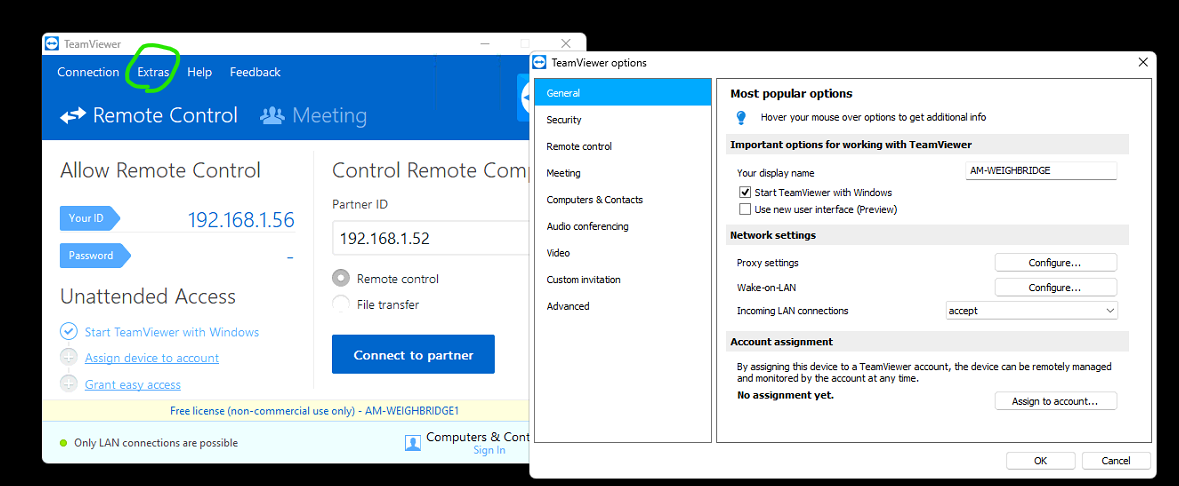
- Go to General
- Ensure Start with Windows is enabled
- Incoming LAN connections must be set to - Accept
- Go to security
- Set password to funky Kairos
- For bonus points
- Go to Adavanced
- Ensure Close to tray menu is enabled

7.6 LabView Runtime Engine
- Currently the lastest AutoMill KMS software runs on LabView 2020
- For older plants you either require LV2016 or LV2015 runtime engine

- Install with default settings
- Restart the PC afterwards
7.7 Wireflow fingerprint driver
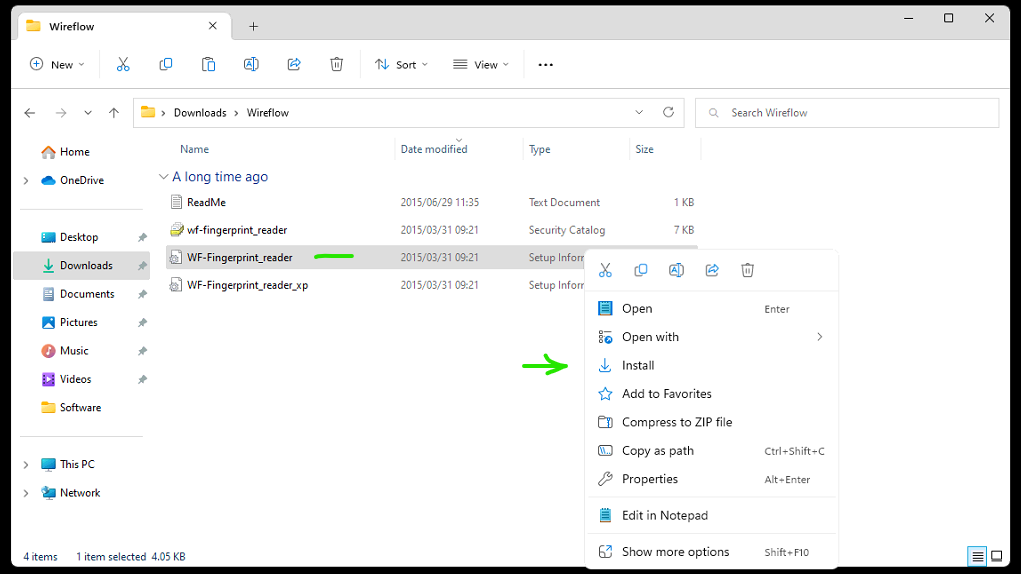
- Copy the files onto the PC
- Right-click and install
7.8 FreeFileSync
- Run the installer found in the test server's software folder.
- Use default settings.

7.9 VMWare Player
- Install VMware Player from the server's software folder.
- Use default settings

7.10 FactoryTalk View Installation
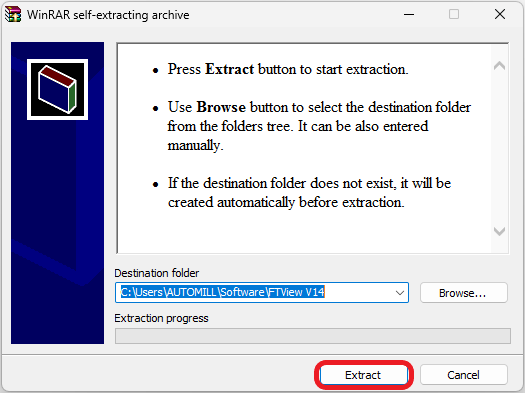
- Get “FTView V14” folder from hard drive and copy onto pc
- Double click “14.00.00-FTView-DVD.part1”
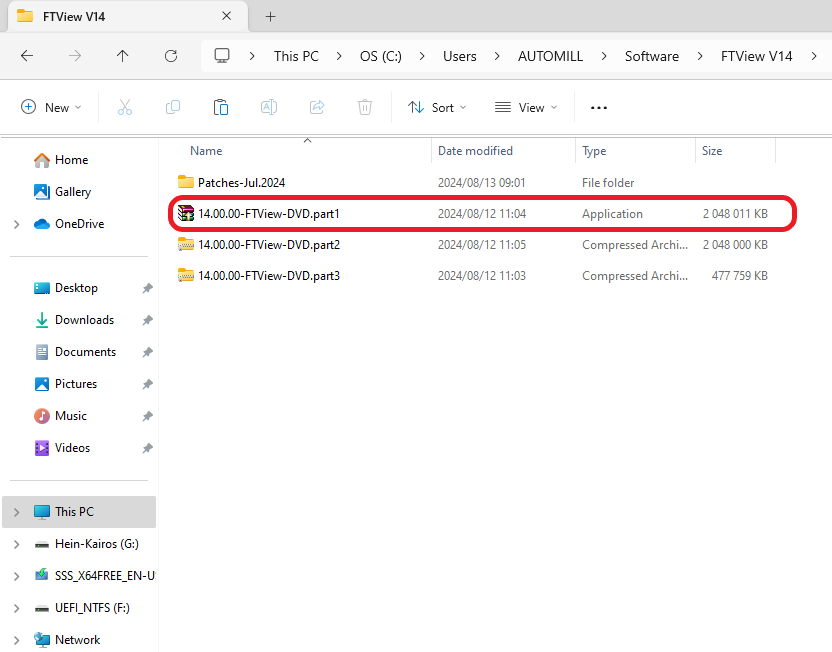
- Click Extract
- Open the extracted folder
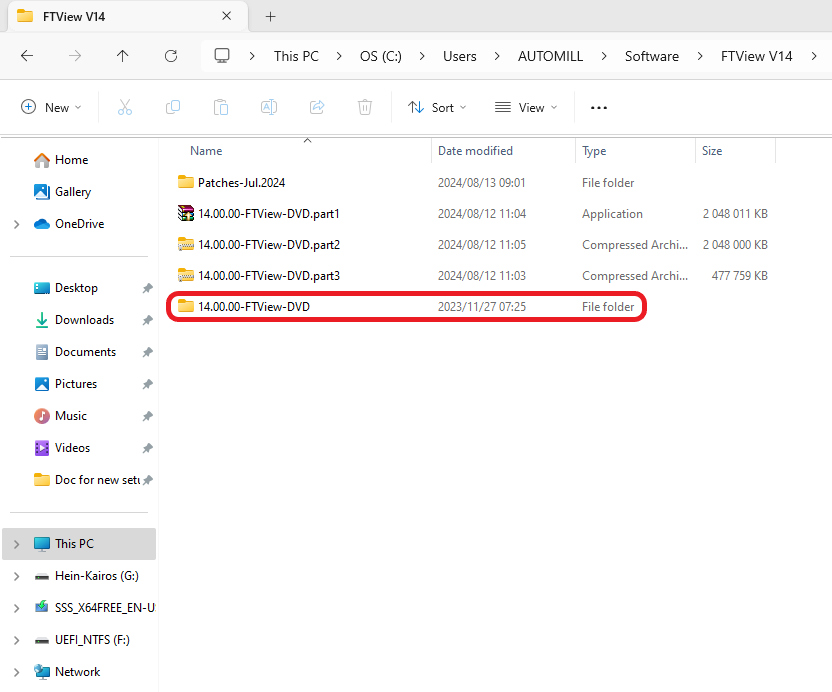
- Scroll to the bottom of the folder and run the setup application

- Click the drop down menu and select Site Edition, Studio Enterprise

- Click Install Now

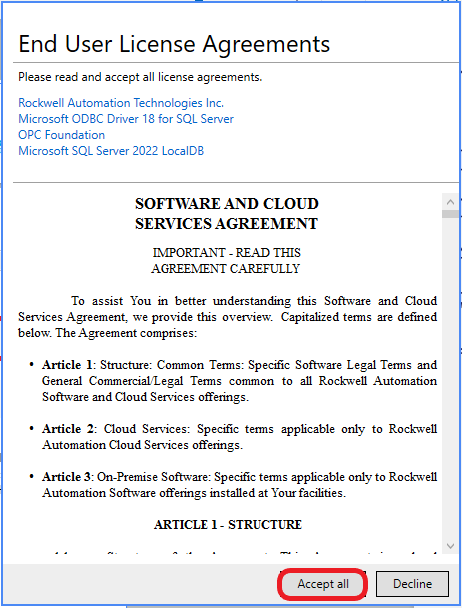
- Click Accept all on license agreement
- Activate Later
- Press the windows button and search for "FactoryTalk Activation Manager"
- Once open click on:
- Manage Activations
- Get New Activations
- Enter the serial number and product key shown
- Once entered click Validate Activation

- Once Validated, click Download Activation
7.11 Anydesk Installation
Setup anydesk and set the password to Unattended Access and password as Bitek12345. 
Password: Bitek12345
7.12 Code Startup (Shell:Startup)
Step1: Go to windows an type run.
Step2:
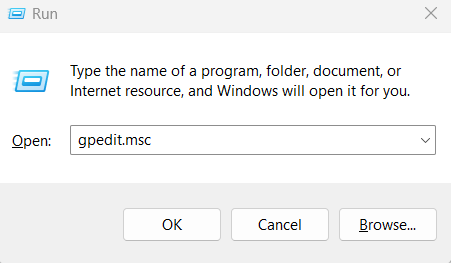
Step3: Follow Steps in Link. https://www.techwalla.com/articles/how-to-disable-a-windows-firewall-with-gpedit
Step4: Confirm Server shell startup after PC restart.
7.13 Studio 5000
Install Studio 5000 using office hard drive.
7.14 Install LR Device

7.15 Copy code
Copy PLC and Server code from "Teams/Client-Specific files/Bitek/Master File.
7.16 VM V35
Copy over the VM for the workstation 2017 to the software folder.

When the VM player is up and running after installation. Open the VMware and select open a Virtual Machine.
Select the Machine.

This will appear and then select.

The following popup will appear that will display asking if you moved it or copied it. Select “I Moved it.”
8. Clear the desktop
- The desktop should look like this (over teamviewer)

- Add FTView, FreeFileSync, Teamviewer, and VMware player to the taskbar.
- To remove recycle bin go to Settings->Personalization->Themes-Desktop icon settings
- Uncheck Recycle Bin

- Right click on the taskbar
- Select Taskbar Settings
- Uncheck the unnescecary items
- Automatically hide the taskbar

- Ensure that the Windows Firewall is turned off.

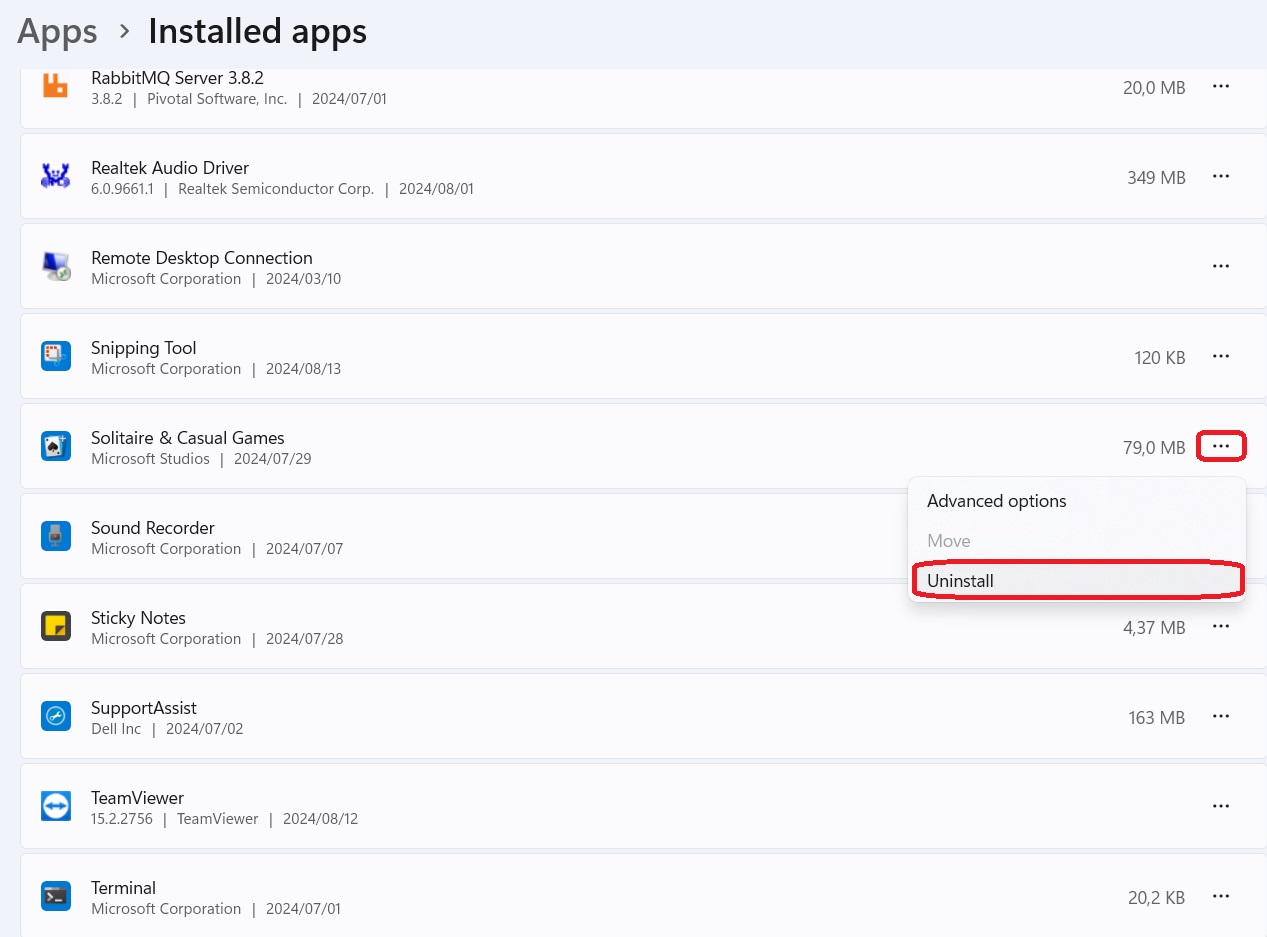
9. Remove all entertainment applications
- Press the windows button and search for "Installed Apps"
- Uninstall all entertainment applications (Solitaire&CasualGames, Xbox, paint) by clicking the three dots and selecting "Uninstall"
10. Disable power and sleep
- Press the windows button and search for "power and sleep"
- Click the drop down under "When plugged in, turn off after" and select "Never"
- Click the drop down under "When plugged in, PC goes to sleep after" and select "Never"

11. Set up Registry for PSExec
- Press the windows button and search for "Registry Editor"
- Navigate to Computer\HKEY_LOCAL_MACHINE\SOFTWARE\Microsoft\Windows\CurrentVersion\Policies\System

- Right click on the "System" file, Go to "New", And click on "DWORD (32-bit) Value"

- Type "LocalAccountTokenFilterPolicy " as the new DWORD value

- Set its value to 1 by double clicking on LocalAccountTokenFilterPolicy

- Restart the pc
12. Add AUTOMILL folder
- Open file explorer and navigate to the "(C:)" drive
- Right click on an empty area within the window and create a new folder
- Name the folder "AUTOMILL"
13. Disable on Policy Editor
13.1 Disable Windows Update
13.2 Disable Factory link instance
1.Press Win + R, type services.msc, press Enter.
2.Scroll to Factroylinx instance01, right click and go to Properties.
3.At Startup type select disable and stop.

13.3 Set SQL Server to Auto
Set SQL Server (SQLEXPRESS), SQL Server Agent (SQLEXPRESS), SQL Server Browser
- Press Win + R, type services.msc, press Enter.
- Scroll to SQL Server (SQLEXPRESS), SQL Server Agent (SQLEXPRESS), SQL Server Browser.
- Right click and go to Properties.
- At Startup type select Automatic.

13.4 Set Intellibuds_Caller to not run as Administrator
- Go to the C drive of the PC
- Go to the Program files(x86) folder
- Go to the Intellibuds folder
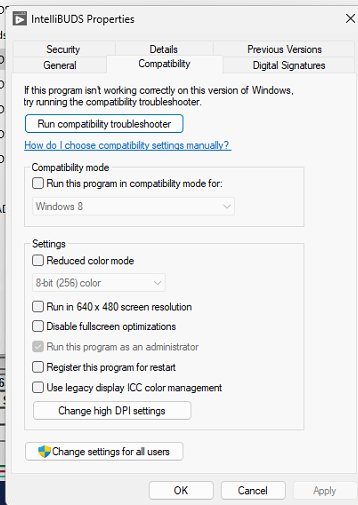
- Right click on the Intellibuds_Caller.exe and click on Properties
- Go to the Compatibility option
- Ensure Run this program as administrator is not selected
- Click on Change settings for all users and ensure the setting is set there as well


13.5 Set Intellibuds to run as Administrator
- Go to the C drive of the PC
- Go to the Program files(x86) folder
- Go to the Intellibuds folder
- Right click on the Intellibuds.exe and click on Properties
- Go to the Compatibility option
- Ensure Run this program as administrator is selected
- Click on Change settings for all users and ensure the setting is set there as well

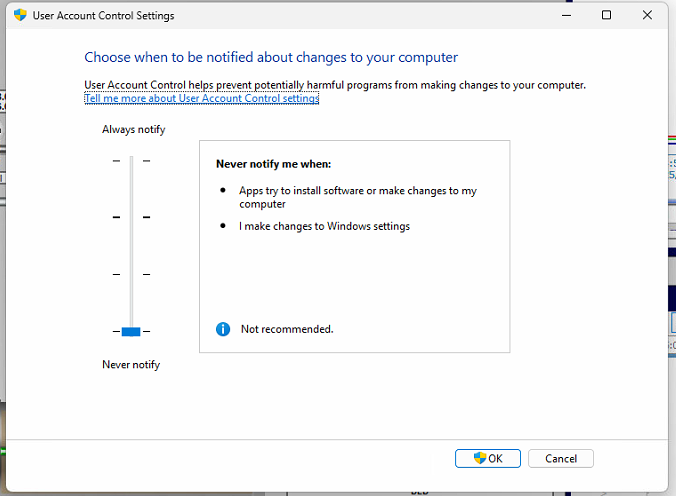
13.6 Set User Account Control Settings
- Press the windows button and search: “UAC”
- Set this to never Notify
14. UDL
14.1 Copying over all the software.
When copying over all the software make sure to set the Intellibuds and Intellibuds HMI into the correct file path C>>Program Files (x86).
14.2 Intellibuds and intellibuds HMI test the udl connection.
C>>Program Files (x86)>>Intellibuds>>UDL. The server that you created in the beginning. Make sure all is correct for these to communicate.
 When all the information is correct and there is communication. Click on Test Connection and it will indicate if it is connected or not.

Do the same with Intellibuds HMI.
14.3 In the Intellibuds file place the “INTELLIBUDS” SCADA there for the correct file path..
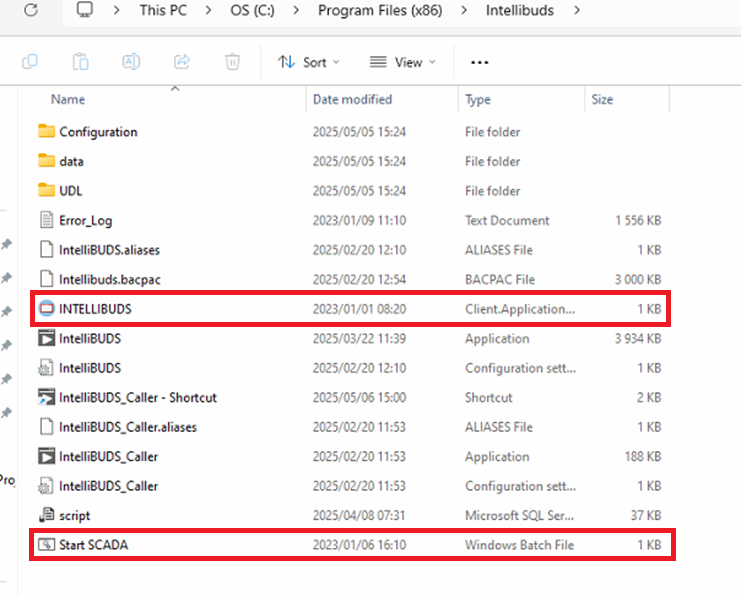
Right click on Start SCADA. Select open in Notepad.The file path must be correct for the SCADA to Auto start when the Recipe.vi finised with the startup.
Restart the PC, make sure it starts up correctly the Recipe.vi and then SCADA.
15. FactoryTalk View Studio
15.1 Link the Startup Screen with the correct file path to open on the SCADA and to do what is needed. (Customer Settings, Master File, Recipe Management, All Users, Manual Start)

Do the same with reporting with the correct file path.
16. Checklist
1 | Change PC Name | AM-Intellibuds |
2 | Create Admin User | Intellibuds |
3 | Remove entertainment Applications (Tiktok, solitaire etc) | ü |
4 | Turn off Windows Firewall (gpedit.msc) | ü |
5 | Change IP Address | 192.168.3.101 |
6 | Set date time to (yyyy/mm/dd) | ü |
7 | Change (,) to (.) as decimal symbol | ü |
8 | Install Teamviewer 12 & Configure for lan | ü |
9 | Set Teamviewer 12 Password | Bitek1234 |
9 | Update Teamviewer | ü |
10 | Install Anydesk | Bitek12345 |
11 | Install Labview/RTE 2020 | ü |
12 | Install Fingerprint driver | x |
13 | Install Printer Driver | ü |
14 | Install code 3 OF 9 Font | ü |
15 | Auto Login (netplwiz) | ü |
16 | Code Startup (Shell:Startup) | ü |
18 | File sharing to server | x |
19 | Clear Desktop (Icons & Taskbar) | ü |
20 | Disable Screen Saver/sleep/Hibernate | ü |
21 | Enable PC to powerup automatically | ü |
22 | Create Folders | |
Automill | ü | |
PLC | ü | |
SCADA | ü | |
Software | ü | |
27 | Install SCADA (Factory talk V##)* | ü |
29 | Install VM Ware player 17* | ü |
Visual studio | ü | |
30 | Copy Studio5000 VM to PC* | ü |
33 | Copy Install files to PC | |
Teamviewer 12 | ü | |
Anydesk | ü | |
Visual studio | ü | |
SSRS | ü | |
Labview/RTE | ü | |
SQL Express | ü | |
Factorytalk View SE Version ## | ü | |
LR Device | ü | |
VMware Workstation | ü | |
34 | Copy PLC and Server code from "Teams/Client-Specific files/Bitek/Master File | ü |
35 | Confirm Server shell startup after restart | ü |
· Install Teamviewer | |||
o Unattended Access ü | |||
o Activate LAN Connections ü | |||
· Install Anydesk | |||
o Unattended Access (PW: BiTEK 12345) ü | |||
· Install LabVIEW Run Time Engine (2016/2020) | |||
o with VISA ü | |||
· Install fingerprint driver | |||
· Install SQL 2019 with SSMS | |||
o SQLEXPRESS instance name ü | |||
o Mix mode (sa PW: BiTEK) ü | |||
o Enable TCP/IP (SQL Configuration) ü | |||
o Restore DB ü | |||
o Setup Backup ü | |||
· Copy over INTELLIBuds code | |||
o Intellibuds ü | |||
o Intellibuds HMI ü | |||
o Intellibuds Reporting ü | |||
Was this article helpful?
That’s Great!
Thank you for your feedback
Sorry! We couldn't be helpful
Thank you for your feedback
Feedback sent
We appreciate your effort and will try to fix the article