Introduction
in order to use Telegram within AutoMill, we need to create a new bot and add the bot handle (example: @Automill_OTP_bot) and the API Token (example: 7992956625:AAFQklRCljzuhMRF349Aqhmglszd9PTSug8) to User Management for a specific site.
How to create a Telegram Bot
refer to https://flowxo.com/how-to-create-a-bot-for-telegram-short-and-simple-guide-for-beginners/
Install telegram from the app store and follow account creation procedures.
Once telegram has been installed, we need to contact The Botfather. Inside of Telegram at the top right is a magnifying glass. Tap there to search.
Type in “Botfather”.
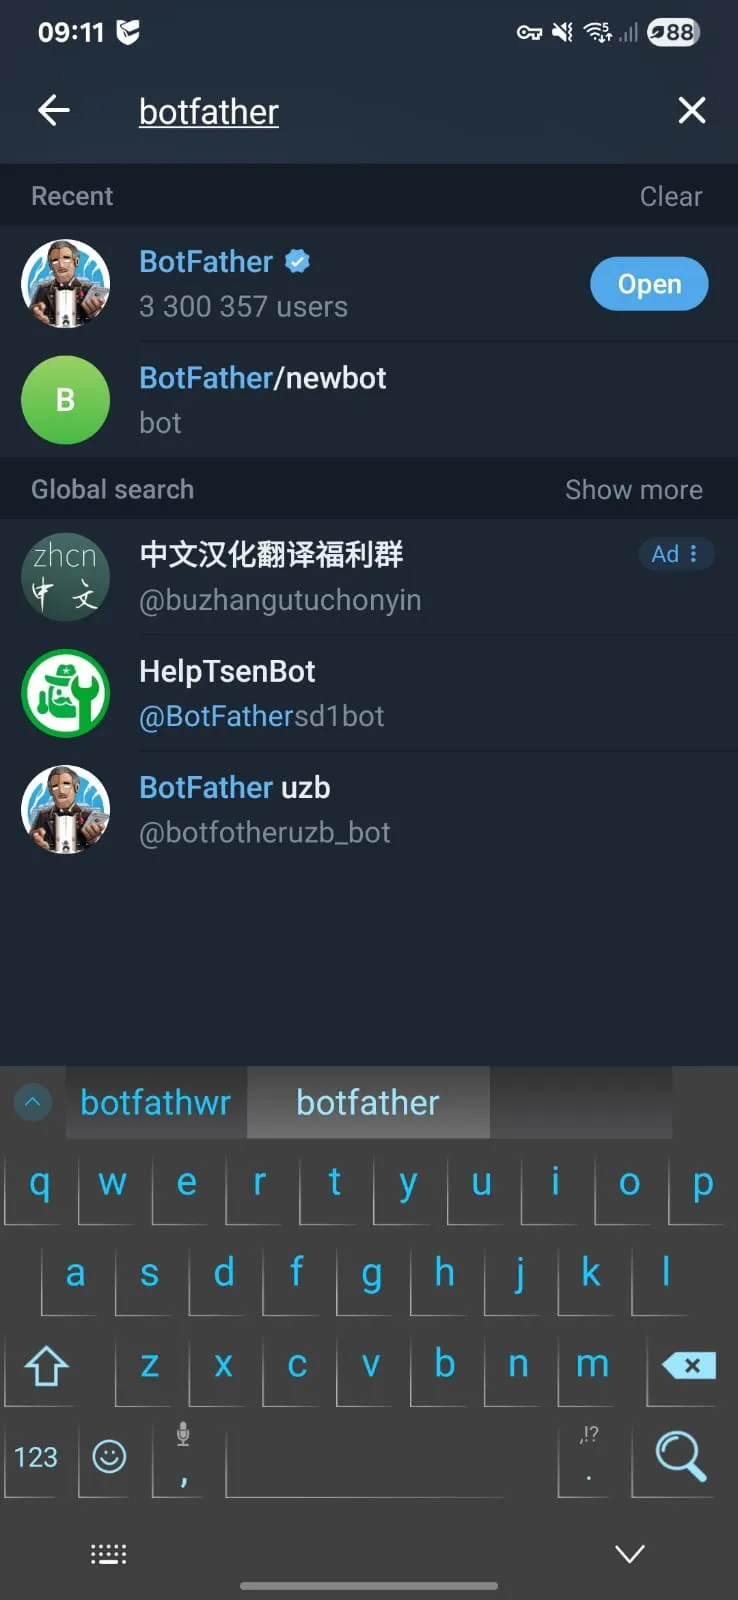
Tap on the chat with the official Botfather account. (indicated by the blue tick).
Once inside of the chat, press Start to communicate with Botfather.

Pressing start sends a /start command to the bot, initiating conversation.
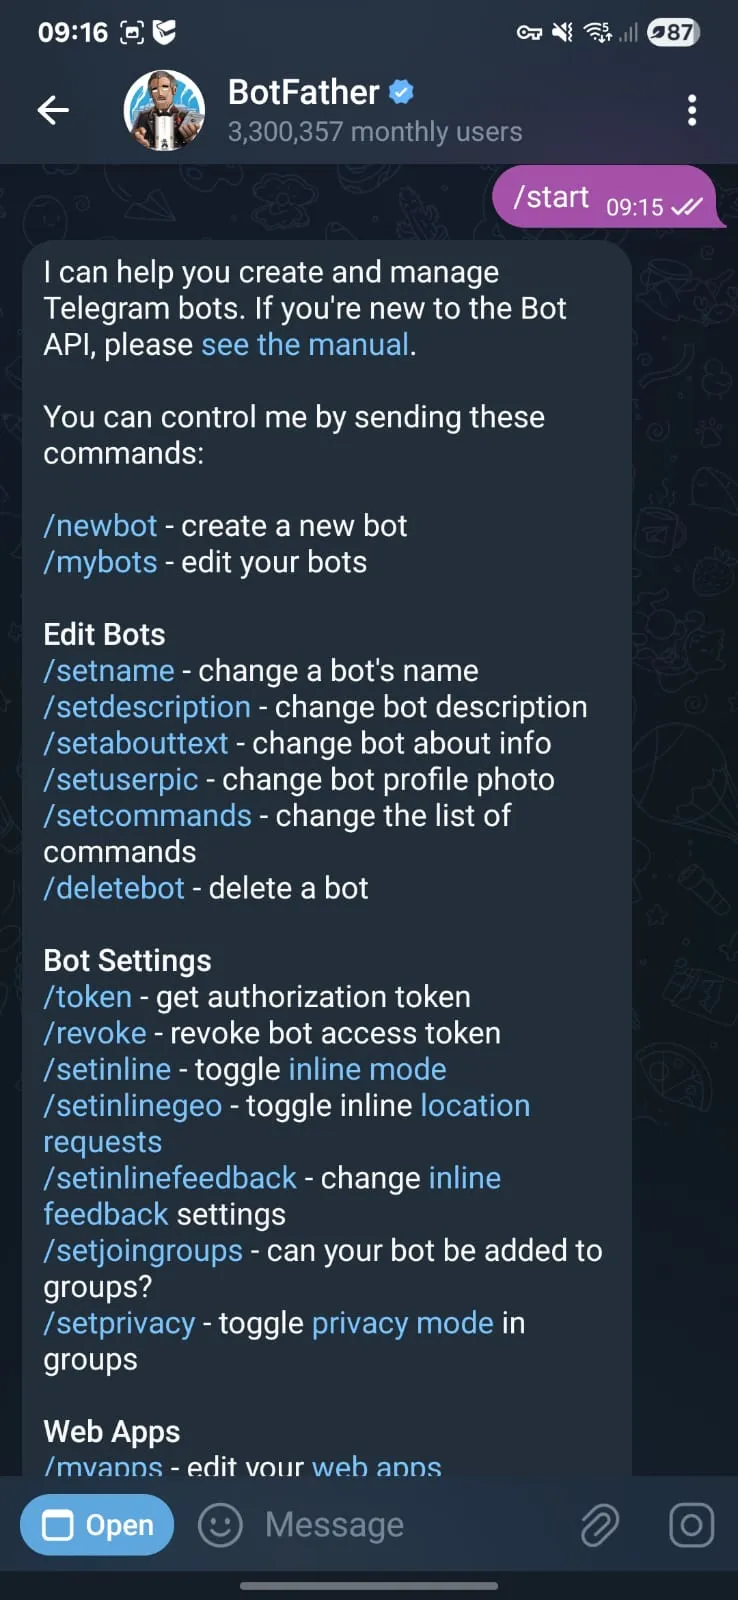
Type in /newbot and press send or simply press on the blue text “/newbot” to send the command.
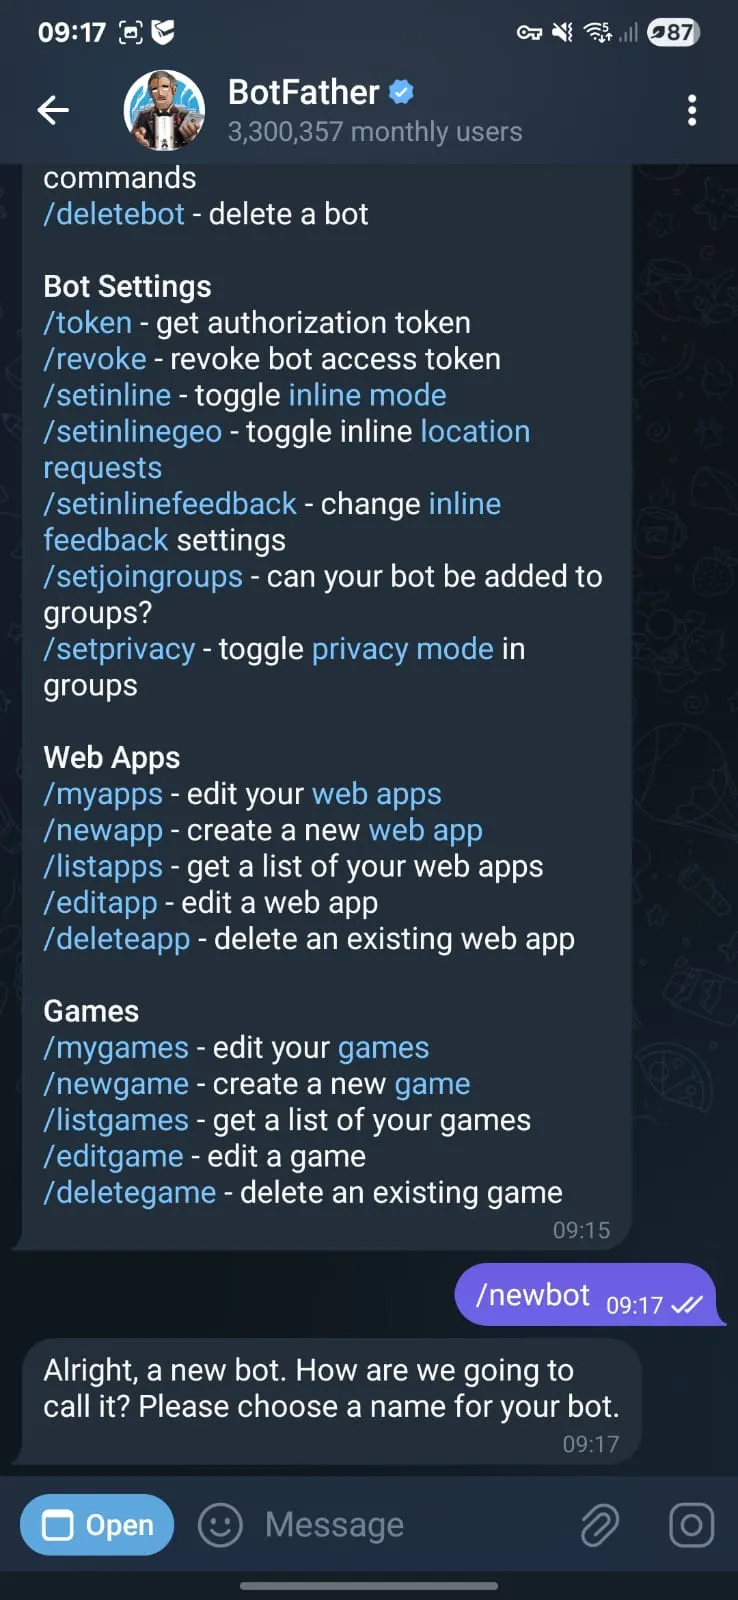
Once the command “/newbot” has been sent, we need to name our bot.
Choose the name AUTOMILL_sitename.
In our case we will be using AUTOMILL_VILJOENSKROON_C.
Once this has been entered, it cannot be undone. Check spelling!
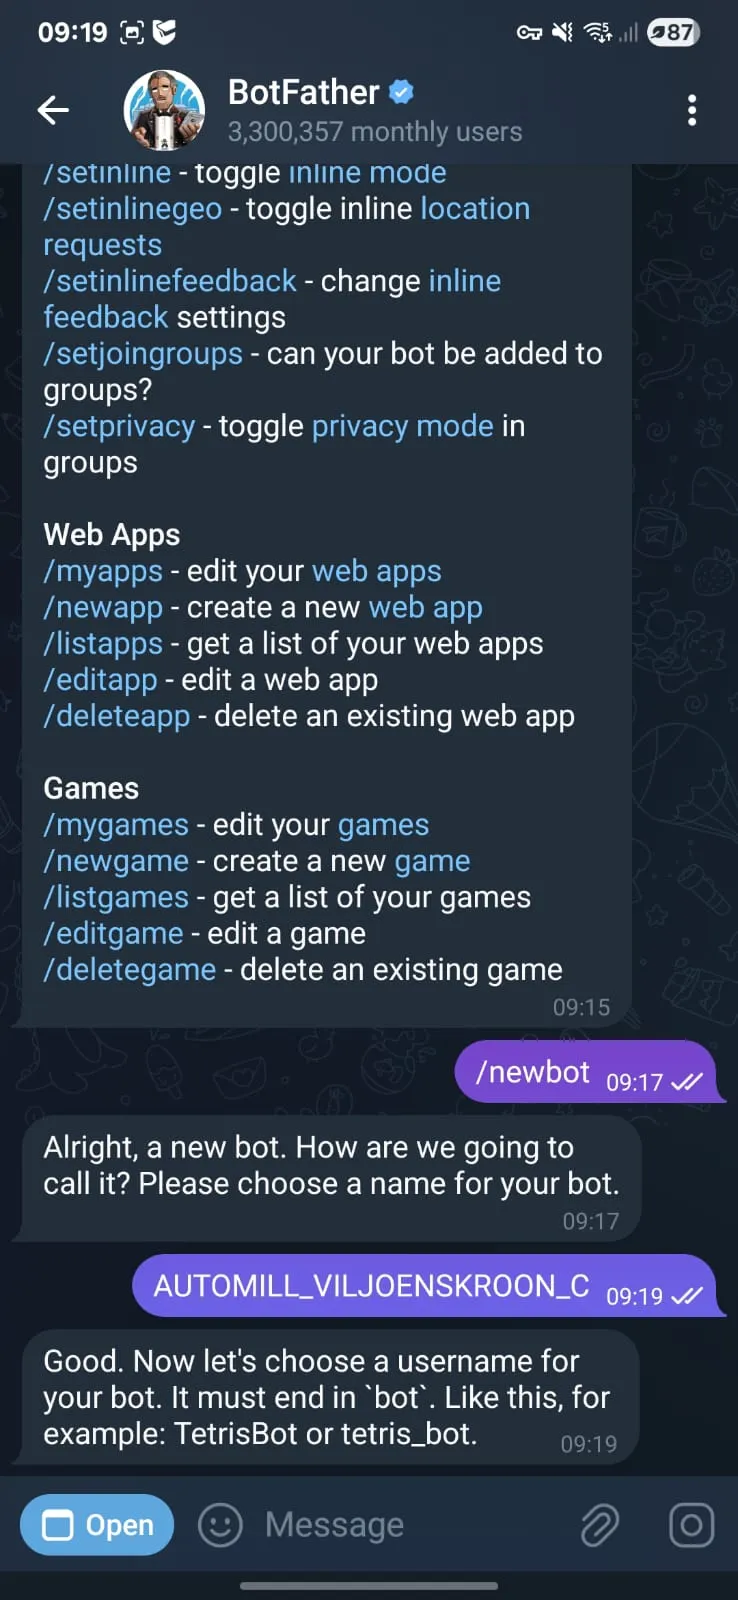
Once our bot has been named, it requires a username. telegram bot usernames must always end in bot.
In this case we will be using AUTOMILL_VILJOENSKROON_C_bot
Once this has been entered, it cannot be undone. Check spelling!

Now we have got the handle (@AUTOMILL_VILJOENSKROON_C_bot) and API Token
(8125306897:AAFLiVuk5V8tL3ulvGiG7Vnxbw4YM7gq3cc) for the newly created bot.
Next is to add a profile picture to the bot.
type in /setuserpic and send.
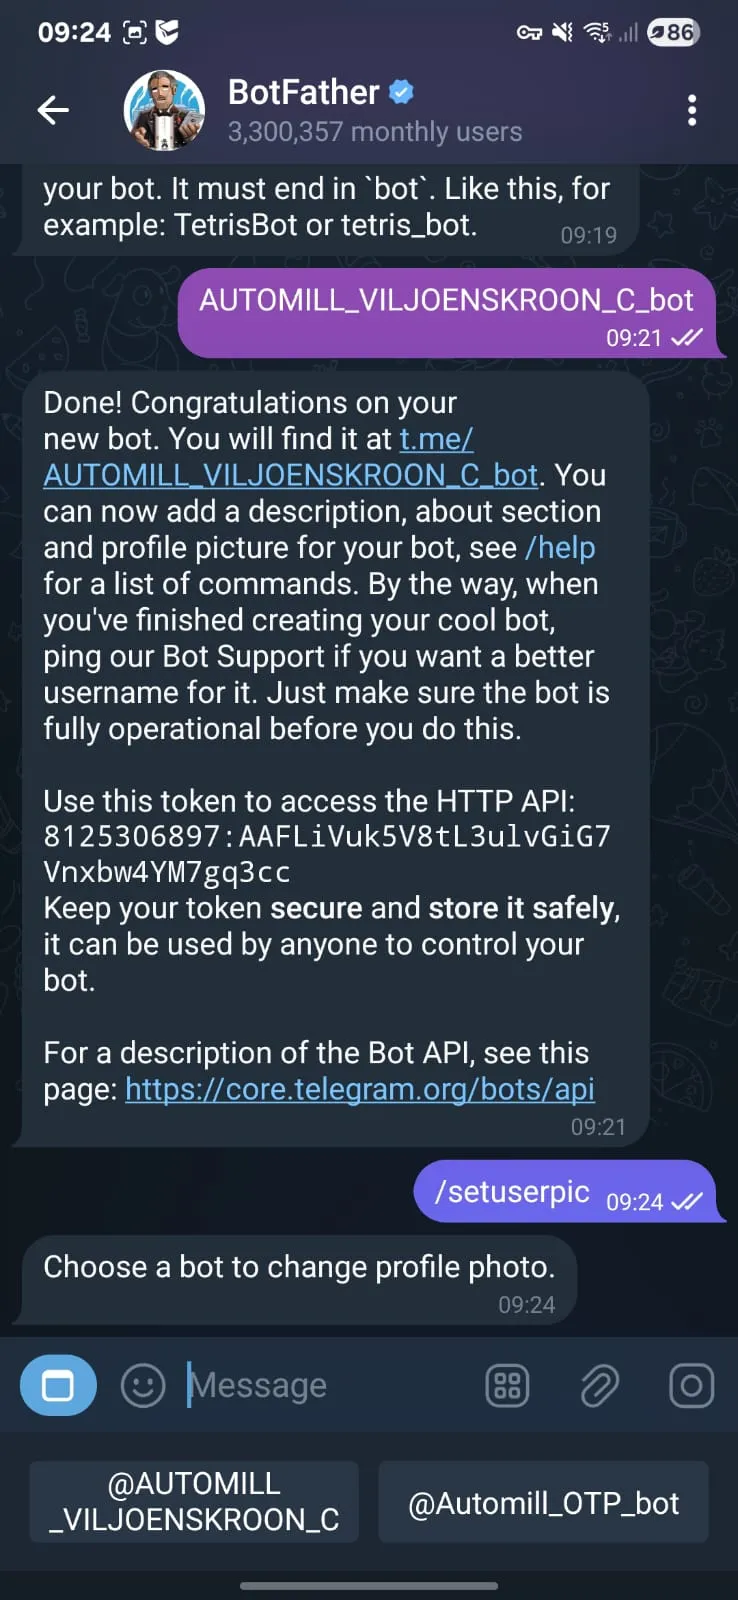
In this case, tap on @AUTOMILL_VILJOENSKROON_C_bot
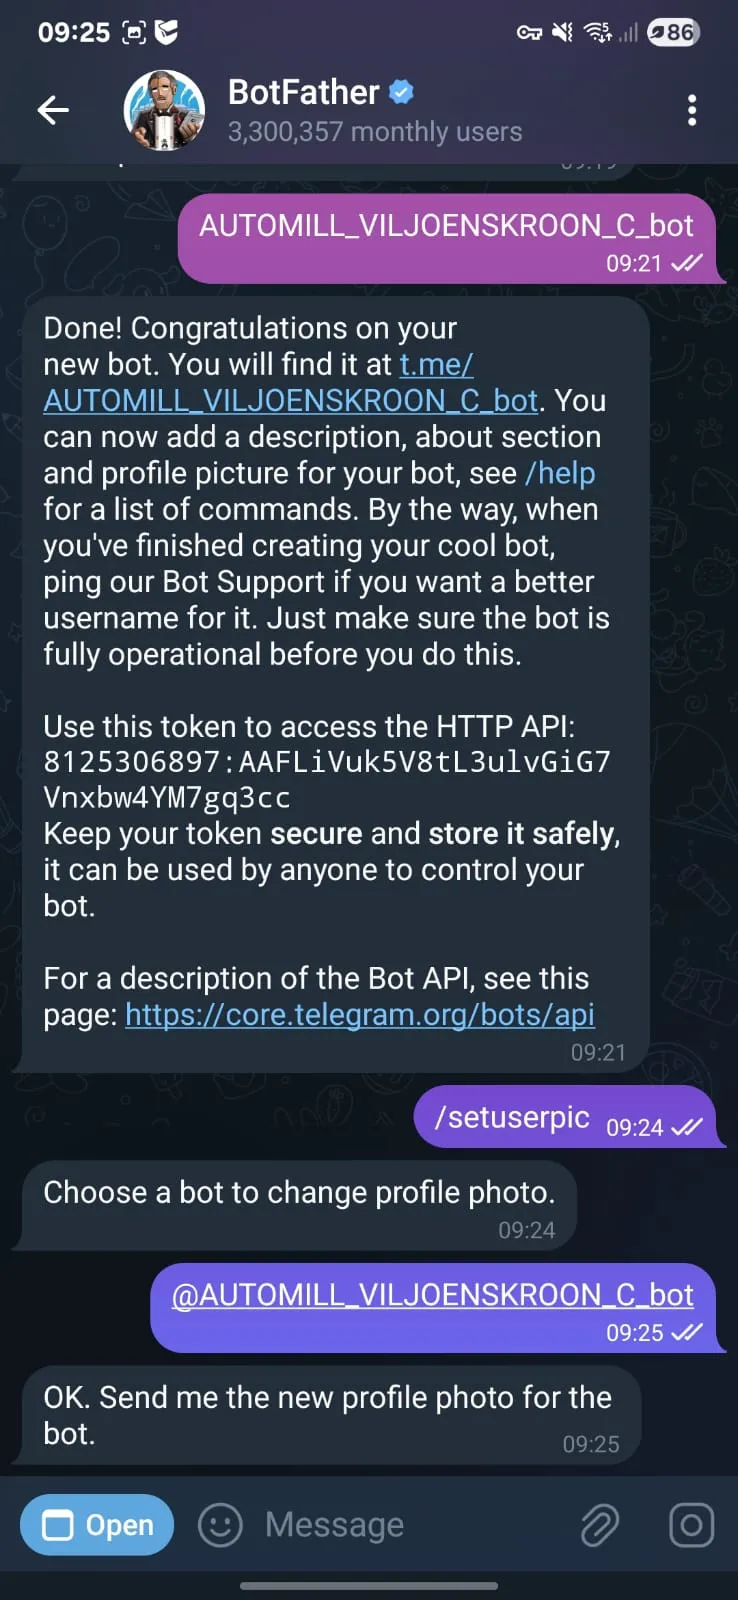
Save the following image to your phone to use as a profile photo for the bot.

Send this image to BotFather.

AUTOMILL_VILJOENSKROON_C now has a profile photo.
The new Telegram bot has been created and can now be added to User Management.
Adding the Telegram handle and API token to User Management

At any available Station with an HMI and User Management, click on the splash screen, then press Ctrl + F12 to access the config page.

Click underneath “Telegram Handle” to type in the bot’s handle. In our case this is AUTOMILL_VILJOENSKROON_C_bot. Do not type in the “@”.
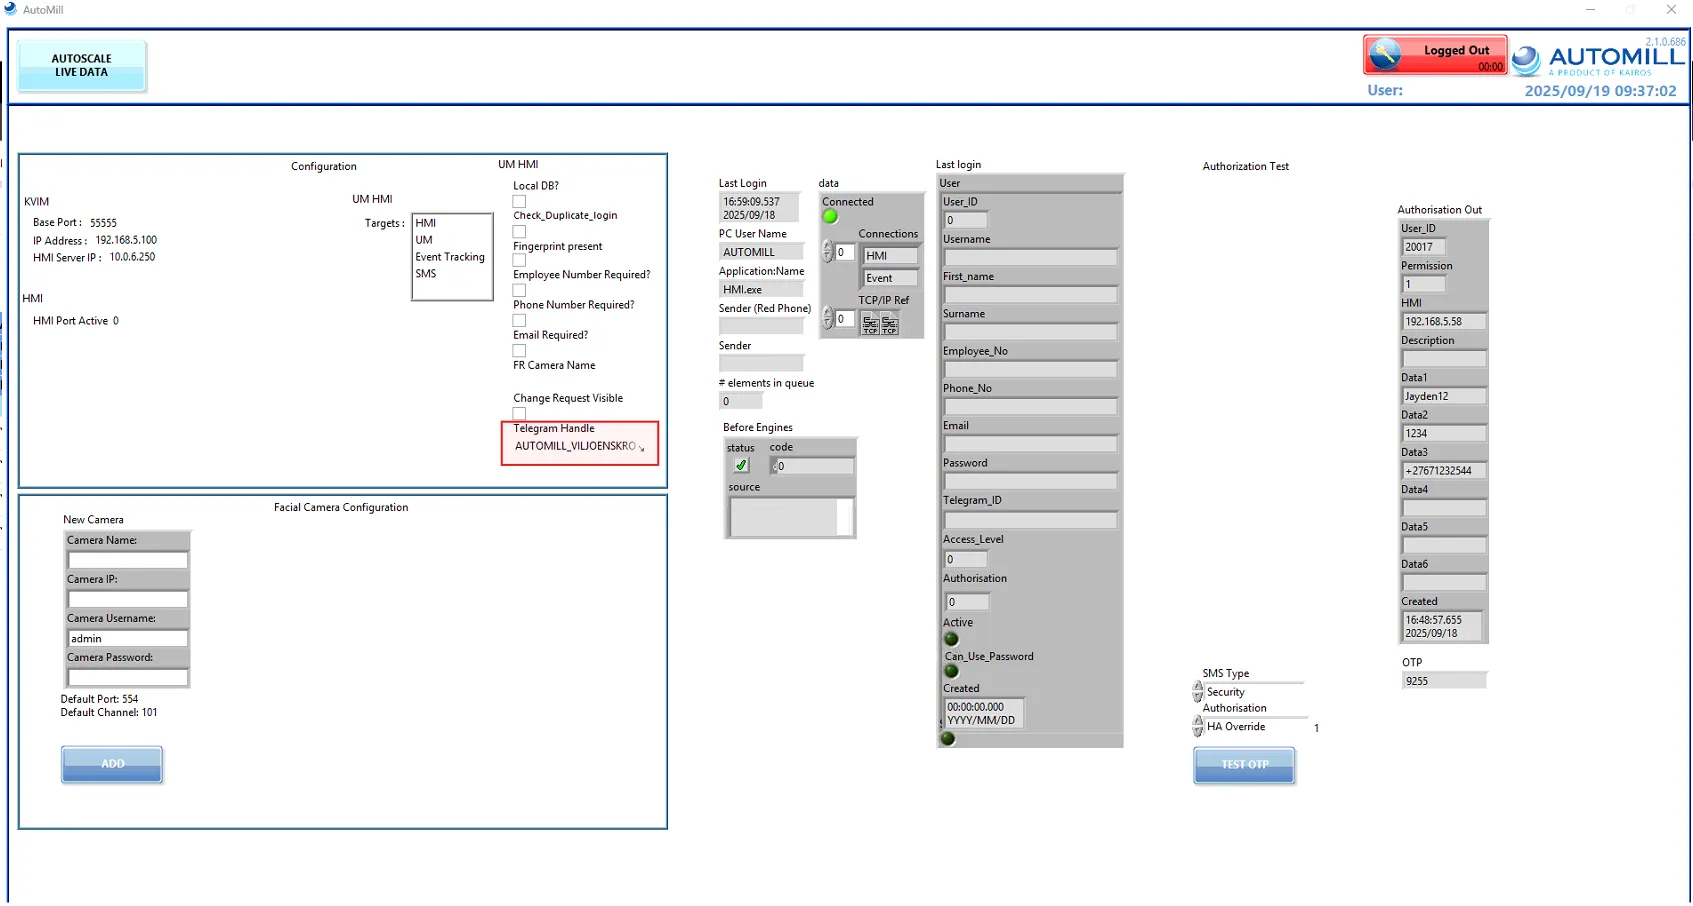
After doing so, click anywhere else on screen to leave the text box. This saves the bot handle inside of the config.
Close the HMI and open it again.
Check that the handle is successfully saved by accessing the config page again.
The Telegram API Token must be added to the User Management Module’s configuration.
Access AutoMill Server, and open the front panel for User Management.

Navigate to the Configuration tab on the module’s front panel.
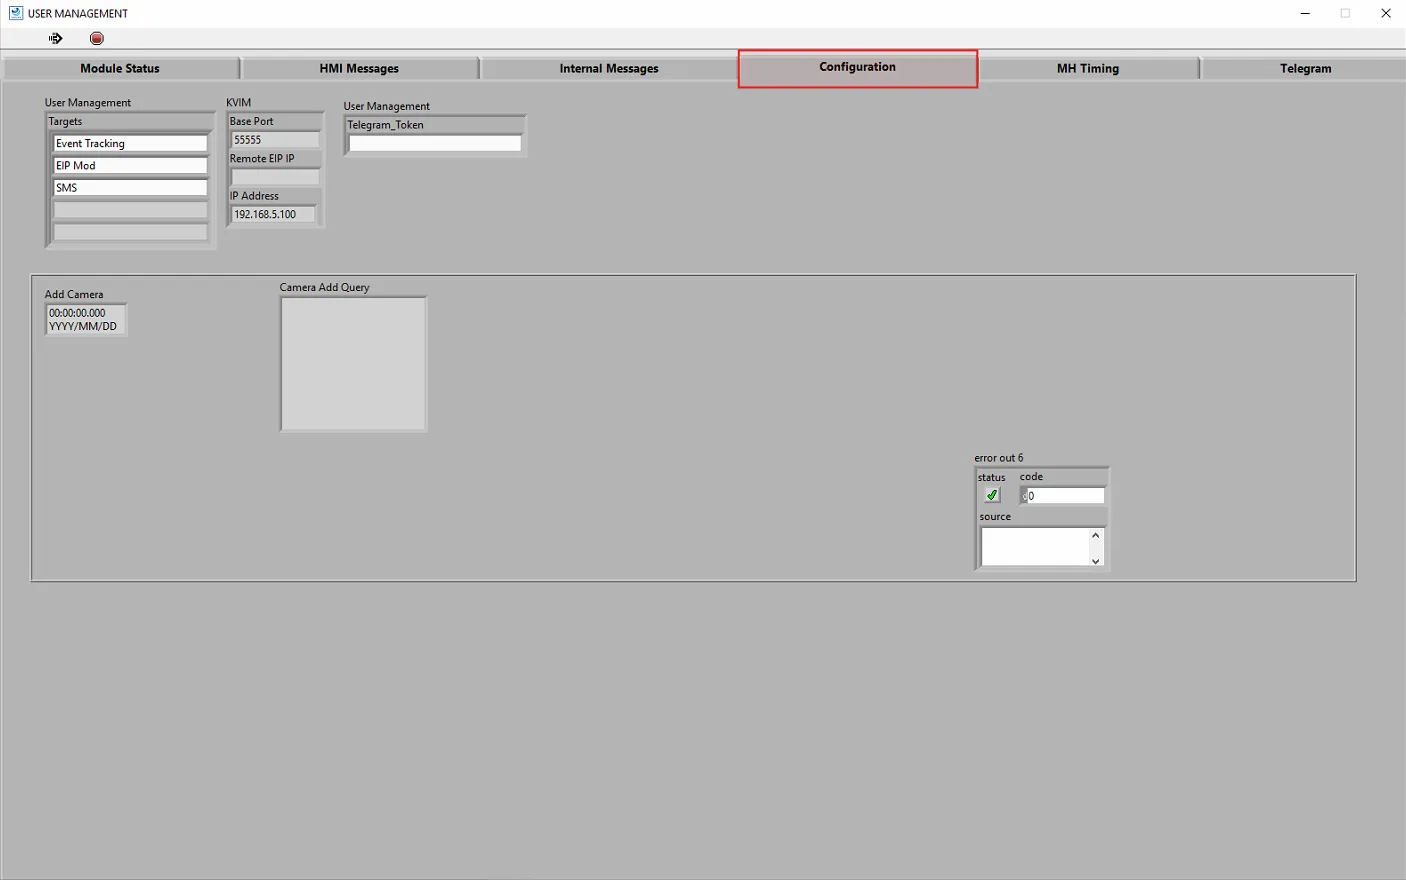
Copy out the Telegram API Token, as example: 8125306897:AAFLiVuk5V8tL3ulvGiG7Vnxbw4YM7gq3cc
and add the word “bot” to the front:
bot8125306897:AAFLiVuk5V8tL3ulvGiG7Vnxbw4YM7gq3cc
paste this string into the highlighted text box:

Click anywhere else on the module to exit the text box and save the Telegram API Token to the config.
Click on the tab “Module Status” and press “STOP/RESTART” to restart the module.
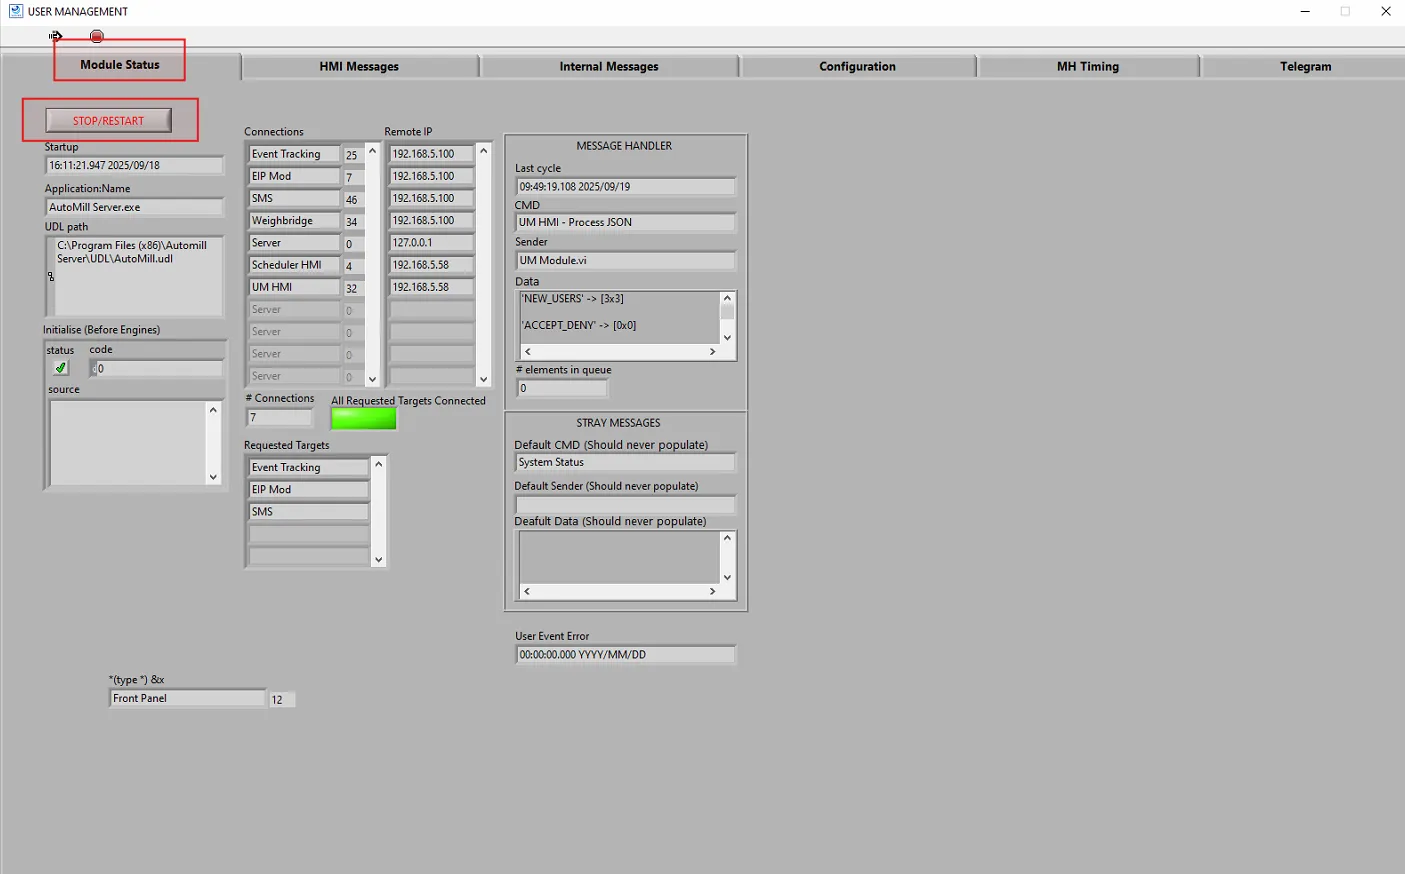
After the module has started up again, open the front panel and navigate back to the Configuration tab to verify that the Telegram API Token has been saved. Now that the handle and API Token have been added to User Management, we are going to test the bot.
Adding Telegram to a User
Head over to a Station with User Management and login under Kairos (or any user with User Management rights).
Navigate to User Management tab.
Here we can register a new or existing user for Telegram.

A new user can now be edited or created to add Telegram to. In our case we will be creating a new user.
Right click on the screen and click on “Add User”.

Here we can fill in our new user’s information.

Once we have fill in the new user’s information, including a surname and phone number, a barcode is generated at the bottom of the screen. This barcode can be scanned using a mobile phone’s camera or barcode scanner app. Telegram must be installed on the user’s mobile phone.

Tap on the link received from scanning the barcode. This will open a link to our bot on the mobile phone’s browser.
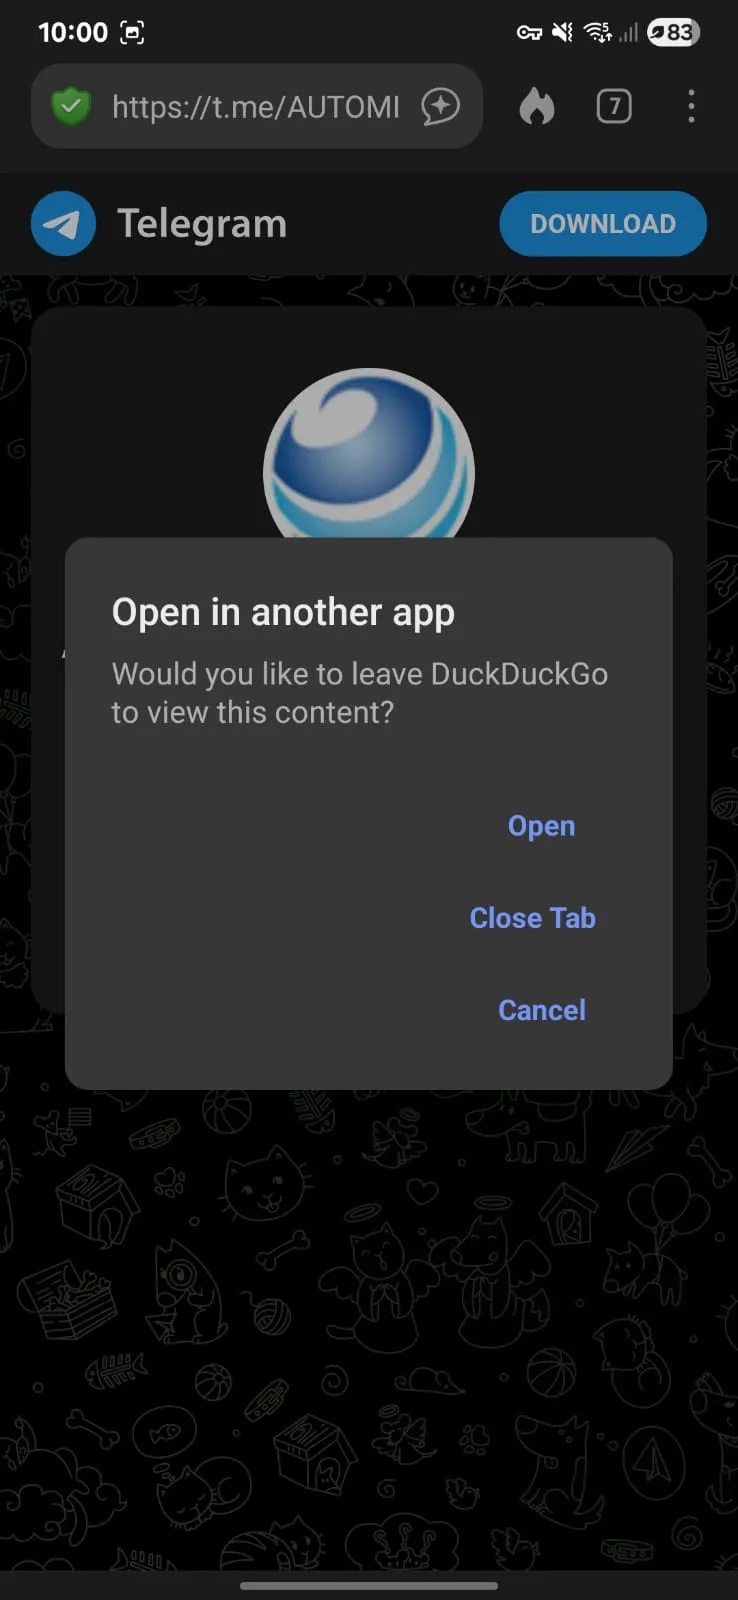
Press “Open” to be directed to the bot in Telegram.

From here on, the “/start” command is automatically sent to the bot or the user is prompted to press start.
Once a “/start” has been sent to the bot, the bot receives a unique hidden message embedded within the start command. in our case what we are actually sending to the bot is “/start Doe27671232599”. This message is unique to the user who scanned the barcode.

After the message has been sent to the bot, we can see that the user’s User Profile now has their unique telegram ID populated.
Press continue and proceed with adding the user and setting their rights. Authorization must be added in order for the user to receive Telegram messages.
Telegram can be deregistered be ticking the “Deregister Telegram” tick box and saving the user’s profile.
Testing the OTP Function

click on the circle (or anywhere inside of the HMI’s module on User Management) to access the Config Page by pressing Ctrl + F12 twice.
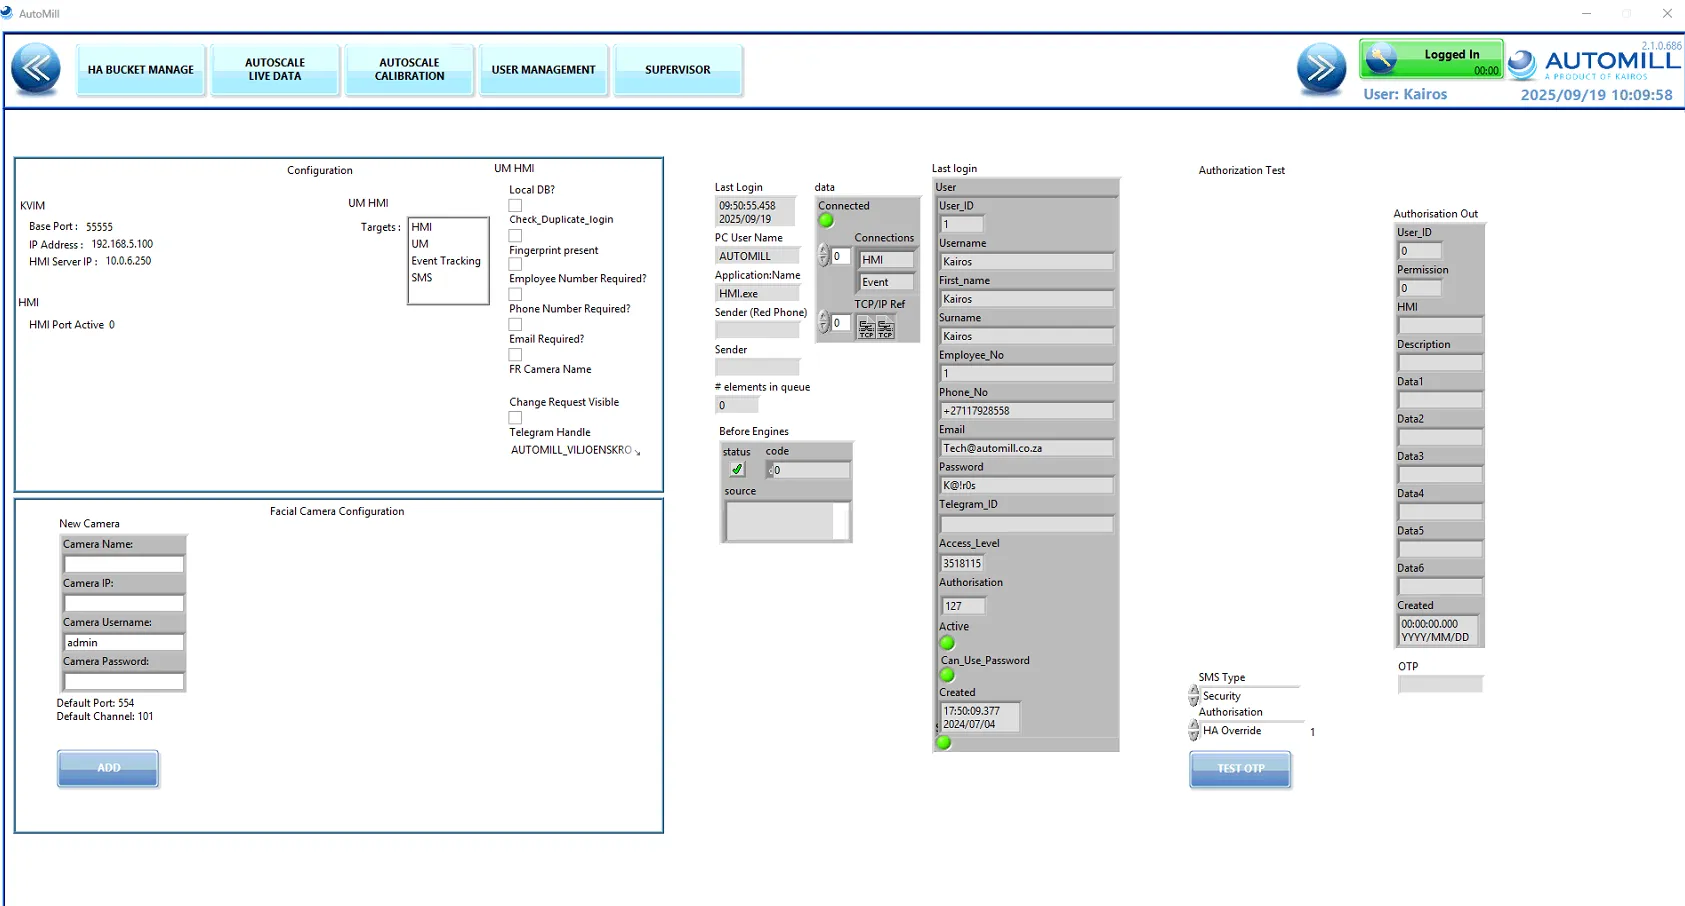 Here we can send a TEST OTP to any selected user with Telegram and Authorization Rights.

Specify SMS Type as Security and Authorization as HA Override.
Click on “Test OTP” to open up a Test OTP popup.

Press ONE TIME PASSWORD (OTP)
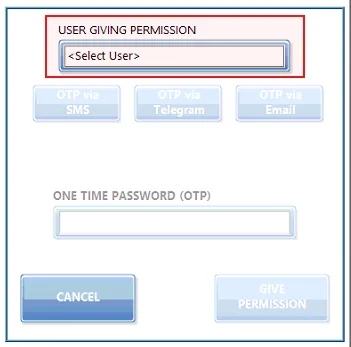
Select a User.
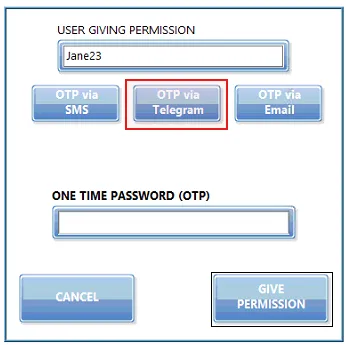
In this case we will be using Jane23, the user we created. Press OTP via Telegram.

We have now sent a test OTP to our user. This will test the user’s Telegram along with our configuration setup from before.

An OTP was received, and the option to directly accept or deny is available or the OTP can be sent to the operator to type in.
Pressing on ‘AUTHORISE’ will allow the OTP and prompt to the operator that the request has been accepted.

The operator can press on Acknowledge to continue after viewing the popup.
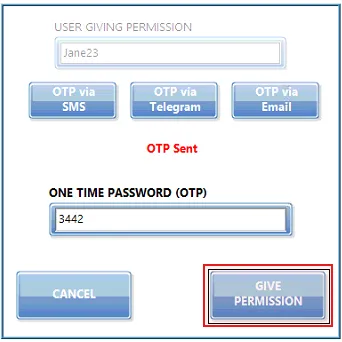
The popup is now auto-populated and pressing “GIVE PERMISSION” will allow and finish the Authorisation request.
When “DENY” is pressed by the Telegram user, a popup is shown that the request has been denied. Pressing Acknowledge dismisses the popup.

Was this article helpful?
That’s Great!
Thank you for your feedback
Sorry! We couldn't be helpful
Thank you for your feedback
Feedback sent
We appreciate your effort and will try to fix the article